


12
ENGLISH
FEATURES
1. On/off switch
2. Variable speed switch
3. Lock-on button
4. Side handle
5. Spindle lock
MOTOR
Warning! Be sure your power supply agrees with
nameplate marking.
Instalation
Assembly and adjustment
Place the polisher disk on the spindle, mount the concave
recess side of the locking nut over the spindle, and
tighten with the two –hole spanner.
Mount the outside spindle over the spindle, Install the
woolen fabrics cover by simply stretching the elastic and
slipping the woolen fabrics cover over the outside spindle.
And let it operate for more than three minutes for
checking it up without load.
Caution! Turn off and unplug from power supply.
Before operating
NOTE: Although this discussion deals with polishing a car,
your polisher is capable of polishing a wide array of flat
surfaces such as hardwood floors, furniture, boats and other
surfaces that could use an occasional shine. Before you
begin, make sure the car is clean and dry. The work area
should be dry also. If necessary, remove road tar with a
general cleaner before polishing. Also remove excess grease
spots, bug stains, etc.
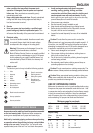
Selecting the correct operating speed
The work speed of the rotating part is controlled by the timing.
Switch indicated in figures. The further the switch is moved
away from its off position, such as from 1 to 2, the faster the
work part rotates.
Operation
Make sure the polisher is in the “OFF” position before
plugging the polisher into an appropriate power outlet.
To switch your polisher on, press the on/off switch. To
switch it off press the on/off switch.
ALWAYS START AND STOP THE POLISHER ON OR
AGAINST THE SURFACE. Place the cord over your shoulder
and do flat surfaces first - hood, trunk and roof. Cover areas
quickly with broad, sweeping strokes in a criss-cross pattern.
DO NOT press down on the polisher. The machine’s
action, not pressure, does the best job.
After flat surfaces are covered with wax, do sides of
the car. Let the cord hang free. It is not necessary to use
a criss-cross motion on doors and fenders.
Put a clean polishing bonnet on the polisher
Polish the wax. Use long, sweeping strokes in a criss-cross
pattern. Do not press hard. Let the polisher do the work.
Warning! Before working , let it operate for no less one
minute without load. First , ensure that the polisher disc is
resting on the work surface. Grasp polisher and turn it on.
Move it in long, sweeping strokes along the surface, letting it
do the work.
Handy hints
This polisher is a random orbit polisher. it is designed to
wobble. The wobbling motion produces the fine, swirl
free finish.
For best results, use light pressure only, letting the
polisher do the work.
Exercise caution around edges, corners or small surface
areas. Prolonged polishing on edges and corners can
damage these areas.
Polishing bonnet can be hand washed in warm water
and mild detergent. It can be machine dried at the
lowest setting however air drying is recommended.
DO NOT USE ABRASIVE COMPOUNDS. Liquid wax
is recommended to use with this polisher.
The polishing bonnet is only to be used for the final buff.
Do not use it to apply wax.
MAINTENANCE
Your tool has been designed to operate over a long period of
time with a minimum of maintenance. Continuous satisfactory
operation depends upon proper tool care and regular cleaning.
Warning! Before performing any maintenance, switch off
and unplug the tool.
Regularly clean the ventilation slots in your tool using a
soft brush or dry cloth.
Regularly clean the motor housing using a damp cloth.
Do not use any abrasive or solvent-based cleaner.
PROTECTING THE ENVIRONMENT
Separate collection. This product must not be
disposed of with normal household waste. Should
you find one day that your Black & Decker product
needs replacement, or if it is of no further use to you,
do not dispose of it with household waste. Make this
product available for separate collection.
Separate collection of used products and packaging
allows materials to be recycled and used again.
Re-use of recycled materials helps prevent
environmental pollution and reduces the demand for
raw materials. Local regulations may provide for
separate collection of electrical products from the
household, at municipal waste sites or by the retailer
when you purchase a new product.