a
b
a
b
c
c
Slack
29
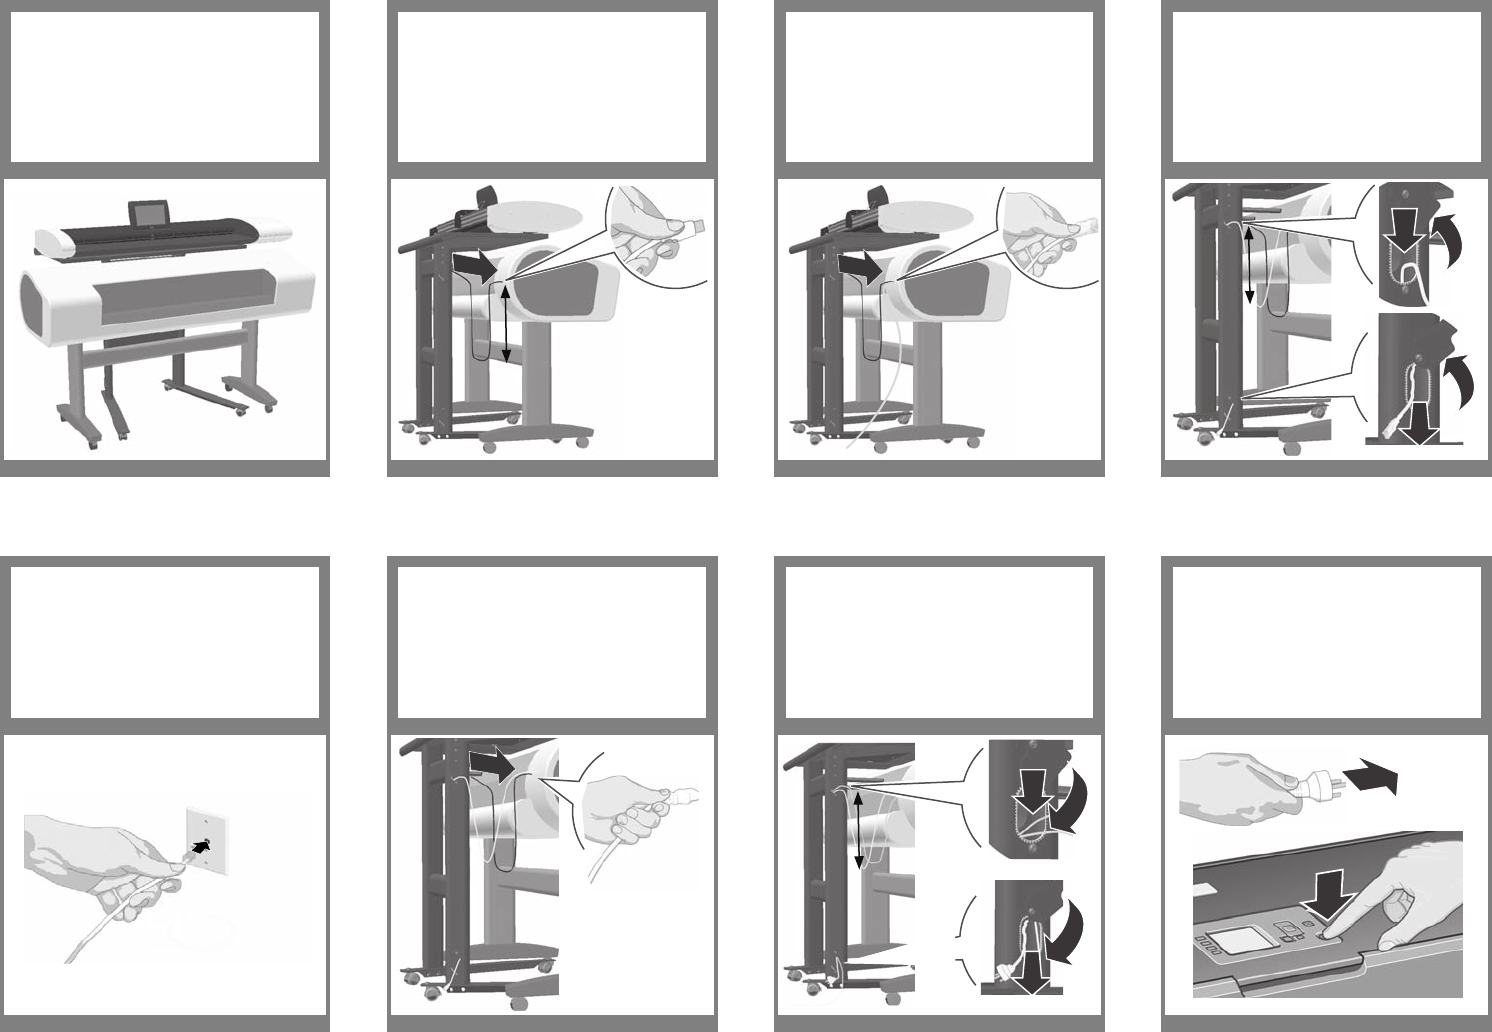
Plug the LAN cable into a connection
socket.
Feed the LAN cable through the leg:
loosen the bottom screw on each hole’s
cover, rotate the cover open to expose
the hole (a). Insert the free end of the
LAN cable in the top hole (b) and pull it
out of the bottom hole (c). Leave enough
slack in the cable to be able to pull out
the printer when changing paper.
30
Connect the printer’s power cable to the
printer.
31
Feed the power cable through the leg:
Insert the end of the cable into the top
hole (a) and pull it out of the bottom
hole (b). Leave enough slack in the cable
to be able to pull out the printer when
changing paper. Push the hole covers
back down and tighten the screws (c).
32
Connect the printer’s power cable to a
power outlet (a) and switch the printer
on (b).
33 34 35 36
a
a
b
c
Slack
Slack
Slack for pulling
out when changing
paper
Your HP Designjet T1120 scanner is now
assembled, and should appear as in the
below illustration.
Connect the printer to the scanner with
the USB cable. Adjust the cable to leave
enough slack to be able to pull out the
printer when changing paper.
Connect the printer’s LAN cable to the
printer. Note: only 1 LAN cable is sup-
plied with the scanner; you will need a
separate one for the printer.
Learning Products Barcelona - Hewlett Packard Company


