Chapter 7 Replacing Consumables and Replacable Parts
7-7
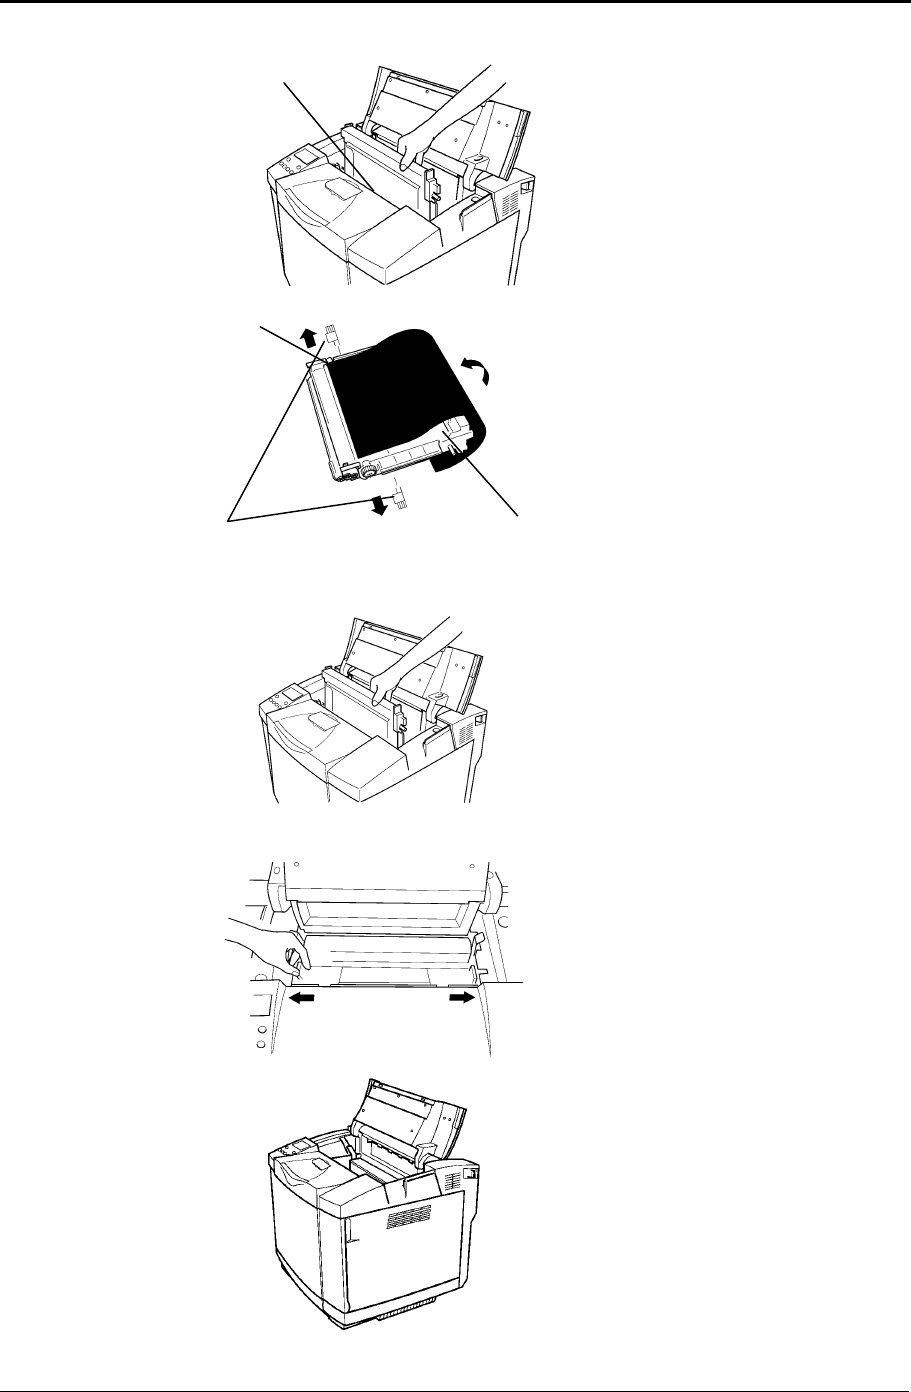
3. Remove the belt cartridge by
holding the black handle.
4. Remove the two shipping pins
from the new belt cartridge.
5. Remove the protective sheet
for the belt cartridge. Pay
attention to the following:
X Do not touch the photosen-
sitive belt.
X Do not wipe off any of the
white powder adhering to
the photosensitive belt.
6. With the photosensitive belt
facing front, slide and keep
hold of the black handle as it
goes down the guide. When it
stops ensure that both ends of
the belt are fully down by
pushing down slightly on the
left and right hand side of the
handle.
7. Pull the lock levers out to lock
the belt cartridge in place.
8. Close the top cover by closing
it and supporting the cover
until it locks into place. Do
not let it drop down. Slide the
4 toners back in and close the
front cover. Power the printer
back on.
Belt cartridge
Photosensitive
belt
Shipping
pins
Protective
sheet


