PSA 4250 Install and Configure 4
© Copyright Hewlett-Packard Company 2003
• DNS Domain Name: The fully-qualified Domain Name should be entered in this field. The
default DNS host name of the PSA is taken from the PSA system name.
In addition to configuring the DNS setting on the PSA, DNS entries for the PSA must be made in the
forward and reverse lookup tables on the DNS server.
If you do not have DNS settings configured correctly on the PSA or on the DNS server, you may
experience the following:
• Slow performance when connecting to the PSA via Network Neighborhood
• Slow response when opening a printer’s properties page
Note: When new firmware or other PSA-specific support information is available, your PSA can
be notified automatically. On the TCP/IP and DNS Settings page, check the field Check
for print server appliance firmware updates during each web login. When new
firmware or support information is available, the picture of the PSA on the Overview
page in the web interface will change.
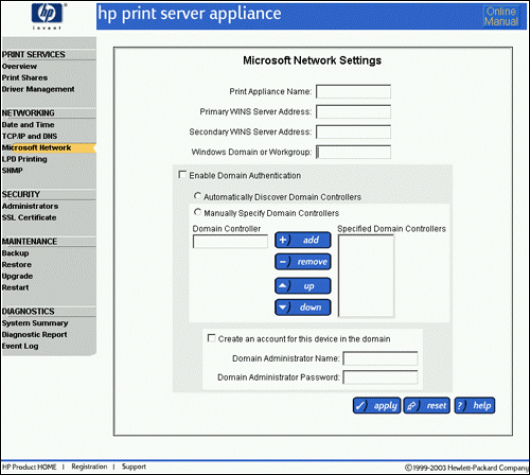
Step 5: Configure Microsoft® Network Settings
Microsoft networking configuration settings must be configured on the PSA (Figure 4). These settings
define the parameters for how the PSA appears and behaves on the network.
Figure 4 – Microsoft Network Settings Page
The following fields are on Microsoft Network Settings page:
• Print Appliance Name – By default, the PSA name starts with HPX followed by the last 6 digits
of the hardware MAC address. This name:


