


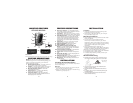


Power Cord Connection
• Plug the small end of the power cord into the
unit’s power jack.
• Plug the large end into the vehicle’s cigarette lighter.
NNoottee::
The cord fits tightly into detector. When
installing the cord, expect some resistance.
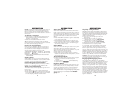
Fuse Replacement
The lighter socket plug is equipped with a
replaceable 2 amp 3AG fuse located behind the
silver tip. To replace the fuse, carefully unscrew
the tip of the plug.
IImmppoorrttaanntt::
Unscrew slowly. The tip contains a
spring which may fly out when disassembling.
Insert the new fuse with the spring and screw on
the tip. With use, the screw cap on plug may
loosen. Retighten it occasionally.
Unscrew the tip of the lighter socket plug
carefully when replacing the 2 amp fuse.
OPERATION
Programmable Text Display
(XTR 425/560 only)
The above models have the ability to modify the
standard laser/radar detector’s display.
“WHISTLER”, “HIGHWAY”, “CITY”, “CITY 1”,
and “CITY 2” can be changed to display your
name, or any combination of 8 characters. For
example, “HIGHWAY” can be changed to “GO
4 IT”.
Note: A space is counted as a character.
WARNING!!! Programming the text display or
the audio is not intended to be done while you
are driving. You should not use any device in a
vehicle that may distract you from observing the
road ahead.
INSTALLATION
To Modify the Text
• Press and hold the Quiet button to enter
Option mode (see page 13 ). Once “USER
TEXT” is displayed simultaneously press and
release the VOL UP and VOL DOWN buttons
each time to scroll through the text that can
be customized. When a text is selected, (use
WHISTLER for example) the display will
indicate “WHISTLER” with a blinking cursor
under the letter “W”.
Note: The blinking cursor indicates that this is
the first letter ready to be changed.
• Press the Volume Up button to advance to the
next letter/character/symbol/space to be
displayed.
• Press the Volume Down button to select the
previous letter/character/symbol/space to be
displayed.
• Press the Quiet button to advance to the next
position in the current word.
• Press the City button to go back to the previous
position in the current word
• Press and hold the City button to change the
character set (A, a, 9, ! etc.).
• Press PWR to exit User Text Mode and return to
OPTION Mode.
• Press PWR again to exit OPTION Mode.
Programmable Audio Tones
(XTR 560 Only)
Model XTR 560 also has the ability to modify the
standard laser/radar detector’s audio tones. Audio
tones such as “X Band”, “K Band,” “Ka Band” “Ku
Band” and “Laser” can be changed to play up to 15
seconds of a favorite tune, phrase, saying, almost
anything you like. When the unit detects K band, for
example, the K band voice will now be followed by
what was recorded for K band.
TIP: Turn off the voice option to have the unit
respond only with the custom recorded alerts.
OPERATION
56
To Modify the Audio, Part 1
• Press and hold the Quiet button to enter Option
Mode (see page 13 ). Once “USER TONE” is
displayed, simultaneously press and release the
VOL UP and VOL DOWN buttons to allow for
selection of Normal Tones or Custom Tones.
(Display shows “ X - Norm” or “ X - Cust”) The
Vol Up button selects Custom Tone and Vol Down
button selects Normal Tone. The Quiet button
advances the menu to the next band selection.
“X - Norm”—› “K - Norm”—› “Ka - Norm” —›
“Ku - Norm” —› “L - Norm”
The PWR button exits User Tone Mode, but still
remains in Option Mode. Press the PWR button
again to exit Option Mode.
To Modify the Audio, Part 2
IMPORTANT: Unit does not detect radar or
laser signals during recording or while playing a
tone.To ensure a quality recording, the source
should be approximately 1” away from the
microphone.
To record or play a message (Record/Playback
Mode):
• Press both volume buttons for less than 2
seconds and release. The unit will beep once;
this enters Custom Mode. Display shows: CUSTOM
The display shows the word PLAY and REC
with accompanying arrows to indicate the
buttons to control these functions (Start/Stop
Play = PWR and Start/Stop Rec = City).
• The display then indicates: CUST--X as X is the
first band ready to record up to 15 seconds of
audio.
• Press and release the Quiet/Record button
advances the recording feature to the next
band.
• Press both volume buttons for less than 2
seconds and release to exit Record/Playback
mode.
OPERATION
7