


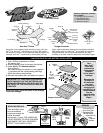
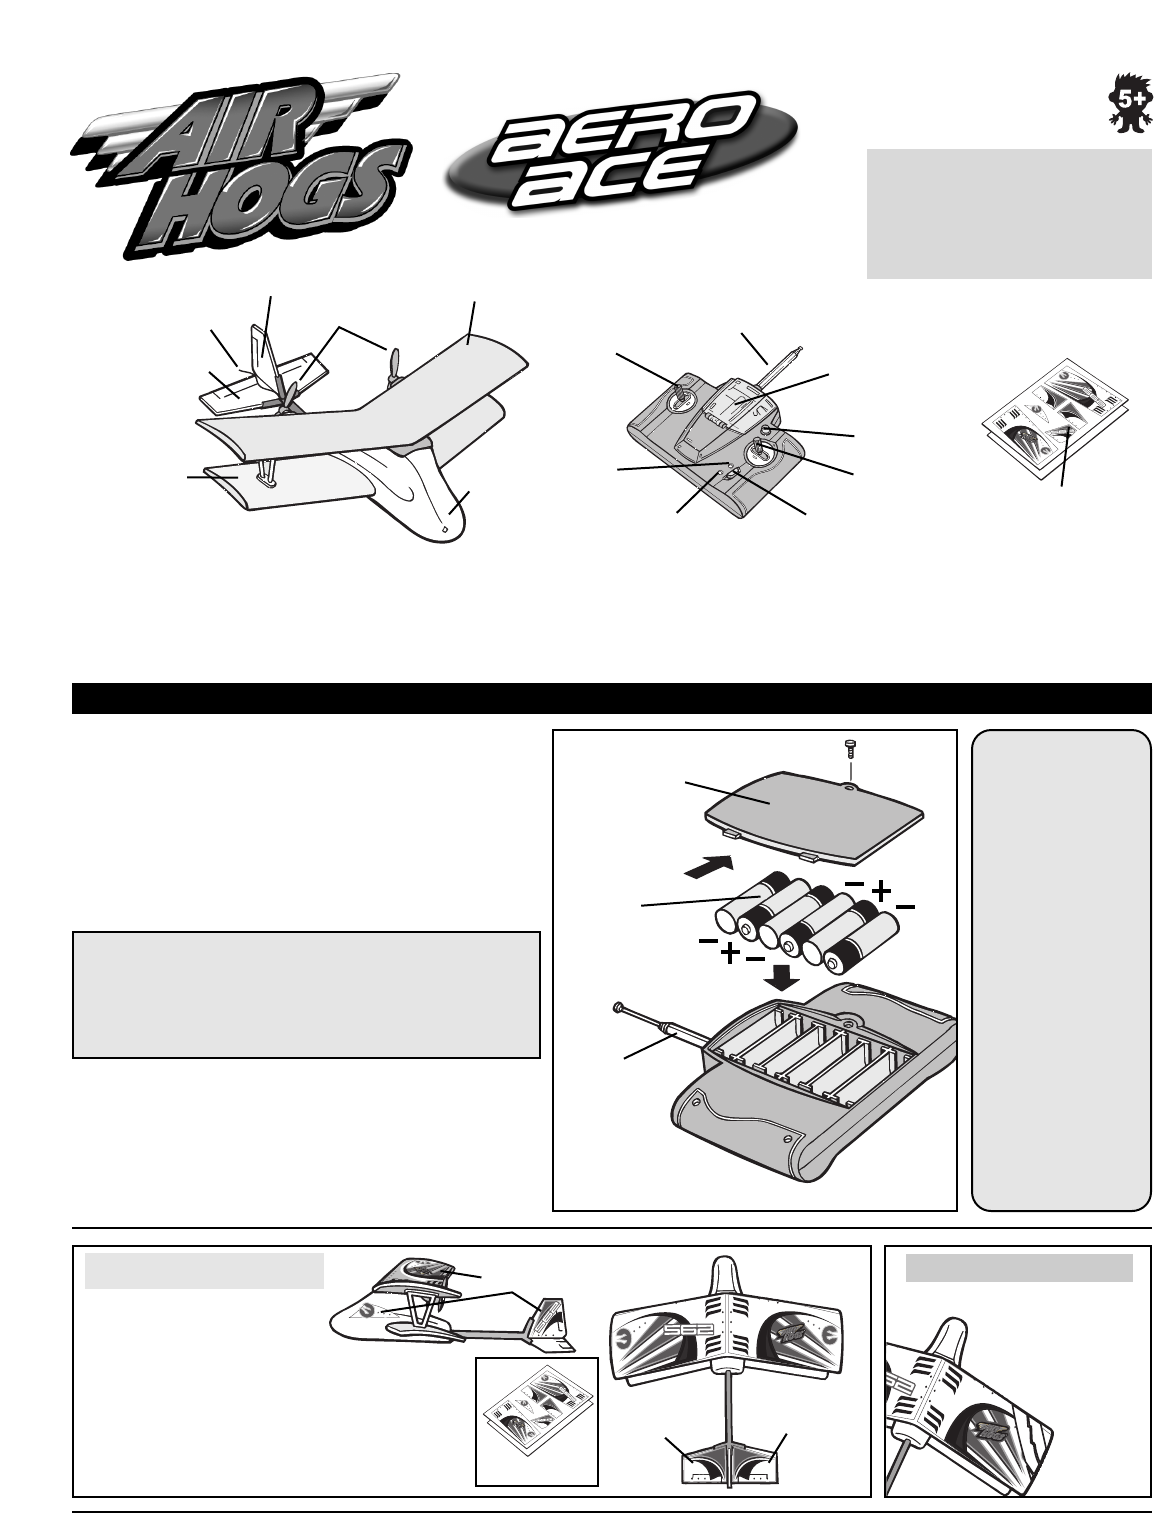
Charger/Controller
Antenna
ON/OFF Switch
Throttle
Charge Door
(to access
Charge Nozzle)
Charging
LED
Power
LED
Left/Right
Toggle
Decal Sticker
Sheet
Steering
Trim Knob
TM
INSTRUCTIONS
TM
Check to make sure contents
are complete:
• 1 Air Hogs
TM
RC Aero Ace
TM
• 1 Charger/Controller
• 1 Decal Sticker Sheet
• 3 Aluminum Stickers
Experience radio-controlled flight with the Air Hogs
TM
RC Aero
Ace
TM
! The Aero Ace
TM
makes flying fun & easy! Just choose
the direction you want to fly and press the controller toggle. The
ultra-light Aero Ace
TM
is powered by a lithium battery for long
flights, features precision speed control and damage-resistant
high density foam. The Aero Ace
TM
also includes an integrated
Charger/Controller unit for convenient portability and easy
handling on the field. Perfect for both indoor and outdoor flights.
Lower Wing
Fuselage
Aero Ace™ Plane
Upper Wing
Propellers
Vertical Tail Wing
Horizontal
Elevator
Antenna
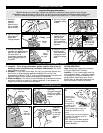
1. Use a Phillips screwdriver to loosen
the battery door.
2. Slide the battery door to the back and remove.
3. Install 6 AA 1.5-V alkaline batteries
(not included).
Be careful to align the positive (+) and negative
(-) polarities with the corresponding markings
inside the battery compartment.
4. Reinstall the battery door and tighten the screw.
3
1
Charger/Controller
Battery
Door
Six AA
1.5-V
Alkaline
Batteries
IMPORTANT TIP: TURN YOUR CONTROLLER
ON TO ENSURE THAT THE BATTERIES ARE
INSTALLED PROPERLY.THE RED LIGHT ON
THE FRONT OF THE CONTROLLER SHOULD
TURN RED.
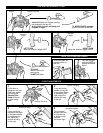
Your
Aero Ace™
Plane has
preinstalled
rechargeable
batteries
in the plane’s
fuselage
.
Because the
Controller’s
AA batteries
are used
for 2 functions –
charging and
controlling, it is
recommended
they be
replaced after
every 20 – 25
flights.
Antenna
After each flight, store the plane in the package
to prevent damage.
REPAIRS
APPLYING DECALS
IMPORTANT: PLACE THE LABELS ON
A FLAT SURFACE TO AVOID CREASES
AND BUMPS THAT WILL ADVERSELY
AFFECT THE PLANE’S FLIGHT.
Peel each Mylar label
from the adhesive
backing and apply the
sticker as shown.
Decal Sheet
Apply
Decal
Apply
Decal
Apply
Decals
2
CHARGER/CONTROLLER BATTERY INSTALLATION
If the wings on
your plane get
damaged they
can be easily
repaired with
clear
tape as
shown.