


6
REPAIR AND MAINTENANCE
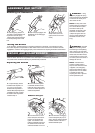
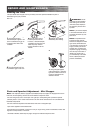
Chain and Tire Replacement –
Mini Chopper
WARNING: To avoid
a pinch or injury, keep fi ngers
away from moving sprockets
and chain.
WARNING:
Increasing
the tension too much can snap
the chain or bend the motor
output shaft. To avoid this, use
caution where tightening and
carefully check the tension
after each 1/8 to 1/4 turn of
adjusters.
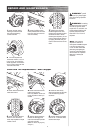
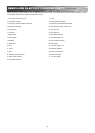
1
Loosen the rear axle by
attaching wrenches to both
axle nuts and loosening
counter-clockwise.
2
Loosen the brake anchor
screw
(attached with the small
bolt in the long slot on the left
side of the frame
).
Note:
This system of
adjusters is common to
motorcycles and BMX bicycles.
If you are not familiar with
it or do not feel comfortable
performing the adjustment,
consult an authorized Razor
service center or a qualifi ed
BMX bike or motorcycle
mechanic.
3
Tightening the adjusters
clockwise tightens the chain;
loosening the
adjusters counter-
clockwise will relax it. When
loosening the
adjusters, you will
have to nudge the axle forward
by tapping the wheel with your
hand to relax the tension on the
chain.
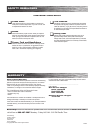
4
Turn both adjusters the
exact same amount, 1/8 to 1/4
turn at a time, to maintain the
wheel alignment. Once the ten-
sion is correct, tighten the axle
and brake anchor bolt.
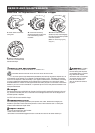
1
Loosen and disconnect the
brake cable anchor.
2
Loosen and disconnect the
brake housing anchor.
Note:
Pay attention to the loca-
tion of the parts for when you
reinstall.
3
Loosen the rear axle by
attaching wrenches to both axle
nuts and loosening counter-
clockwise.
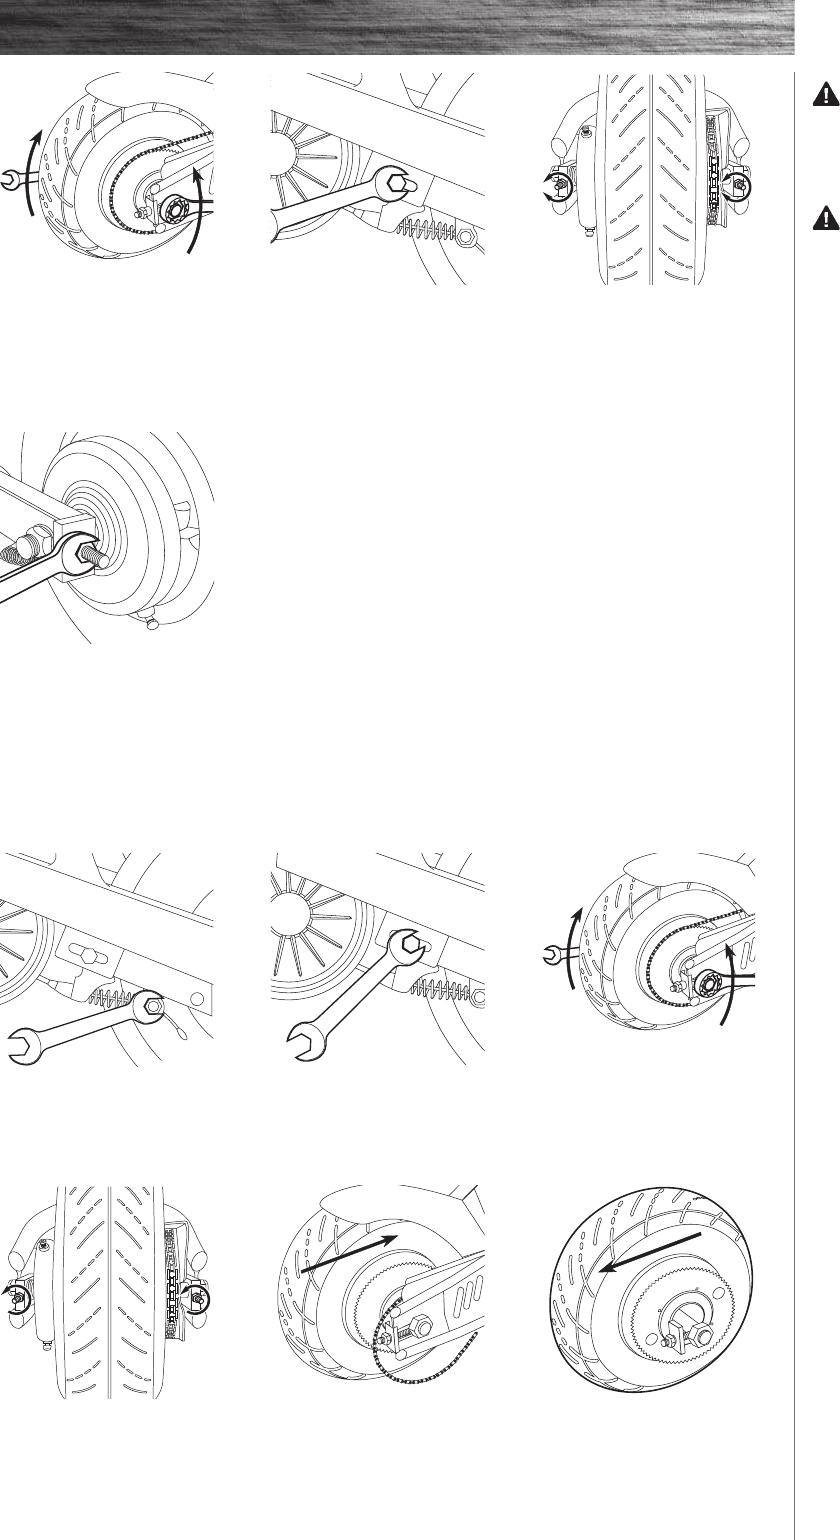
4
Loosen the chain adjusters
about 3-4 turns. Be sure to
loosen both adjusters an equal
number of turns.
5
Slide the wheel forward to
slacken and disengage the
chain from the wheel sprocket
and motor sprocket.
(Note:
Your hands will get greasy
doing this.)
6
Remove wheel and replace
chain or tire. To reinstall wheel,
reverse these steps.