


8
ST30 Bidata Operation and Installation Handbook
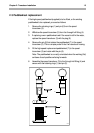
1.2 Mounting procedure
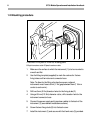
D682a
2413 56
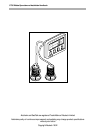
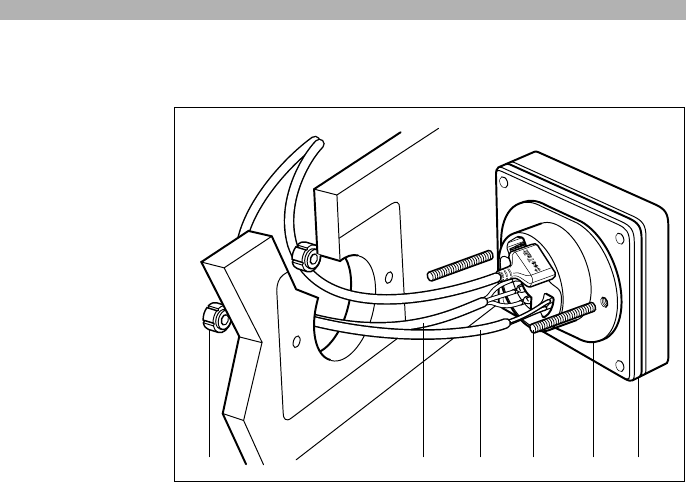
1 Instrument 2 Fixing studs 3 Thumb nuts 4 Sealing gasket
5 Depth transducer cable 6 Speed transducer cable
1. Make sure the surface to which the instrument (1) is to be mounted is
smooth and flat.
2. Use the fitting template (supplied) to mark the centres for the two
fixing holes and the instrument connector boss.
Note:
To allow for the fitting of protective covers, adjacent
instruments must have a 6mm (1/4in) gap between them (116mm
centre to centre min.).
3. Drill two 5mm (0.2in) diameter holes for the fixing studs (2).
4. Using a 60mm (2 3/8in) diameter cutter, drill a location hole for the
instrument connector boss.
5. Connect the power supply and transducer cables to the back of the
instrument (1) (see relevant installation sections).
6. Screw the two fixing studs (2) into the back cover.
7. Install the instrument (1) and secure with the thumb nuts (3) provided.