


19
Installation
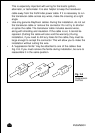
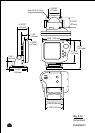
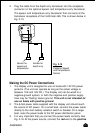
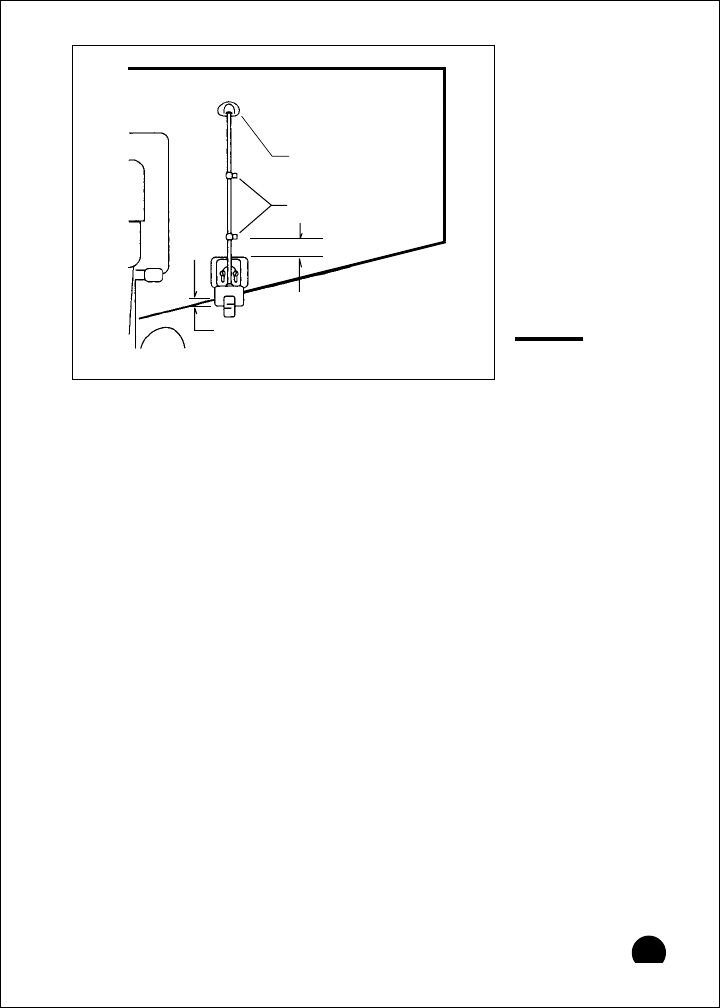
Cable feed-thru
cap
Cable clamp
1" (25 mm)
Hull projections
Fiberglass: 1/4" (6mm)
Aluminum: 1/2" (13 mm)
Fig. 2-13
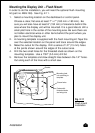
Installing Cable
on Transom
1. Route the cable up and over the top edge of the transom. See Fig.
2-13. Secure the cable using cable clamps. (These clamps are
available from your local marine equipment supplier.)
If you do not want to expose the cable on the deck, you may drill a
new hole (3/4" or 19 mm) through the transom for the cable.
(Remember–this hole must be large enough to accept the cable with
the connector attached. Do not cut the cable!) To seal the opening,
use a feed-thru cap where the cable passes through the transom.
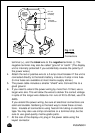
2. Run the cable through the interior of the boat. If the transducer cable
runs near another electrical wire, it may pick up electrical
interference or “noise.” To reduce this, try to keep the transducer
cable separated as far as possible from all other wires. This is
especially important with wiring for the boat’s ignition, alternator, or
tachometer. Also try to keep the transducer cable away from the
antenna and power cables for VHF or FM radios. It is also helpful to
keep the transducer cable away from the FishFinder power cable. If it
is necessary to run the transducer cable across any wires, make the
crossing at a right angle.
3. Be careful not to tear the cable jacket when passing it through
bulkheads and other parts of your boat. Secure the cables using
tywraps or lacing twine. Coil the extra cable and tie it out of the way.
4. If the 20 foot transducer cable is not long enough, a 15 foot exten-
sion cable (5M) is available from your Apelco dealer (PN: M99-140).