


wwwwww
wwwwww
www
.xmodsRC.com.xmodsRC.com
.xmodsRC.com.xmodsRC.com
.xmodsRC.com
11
11
1
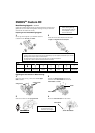
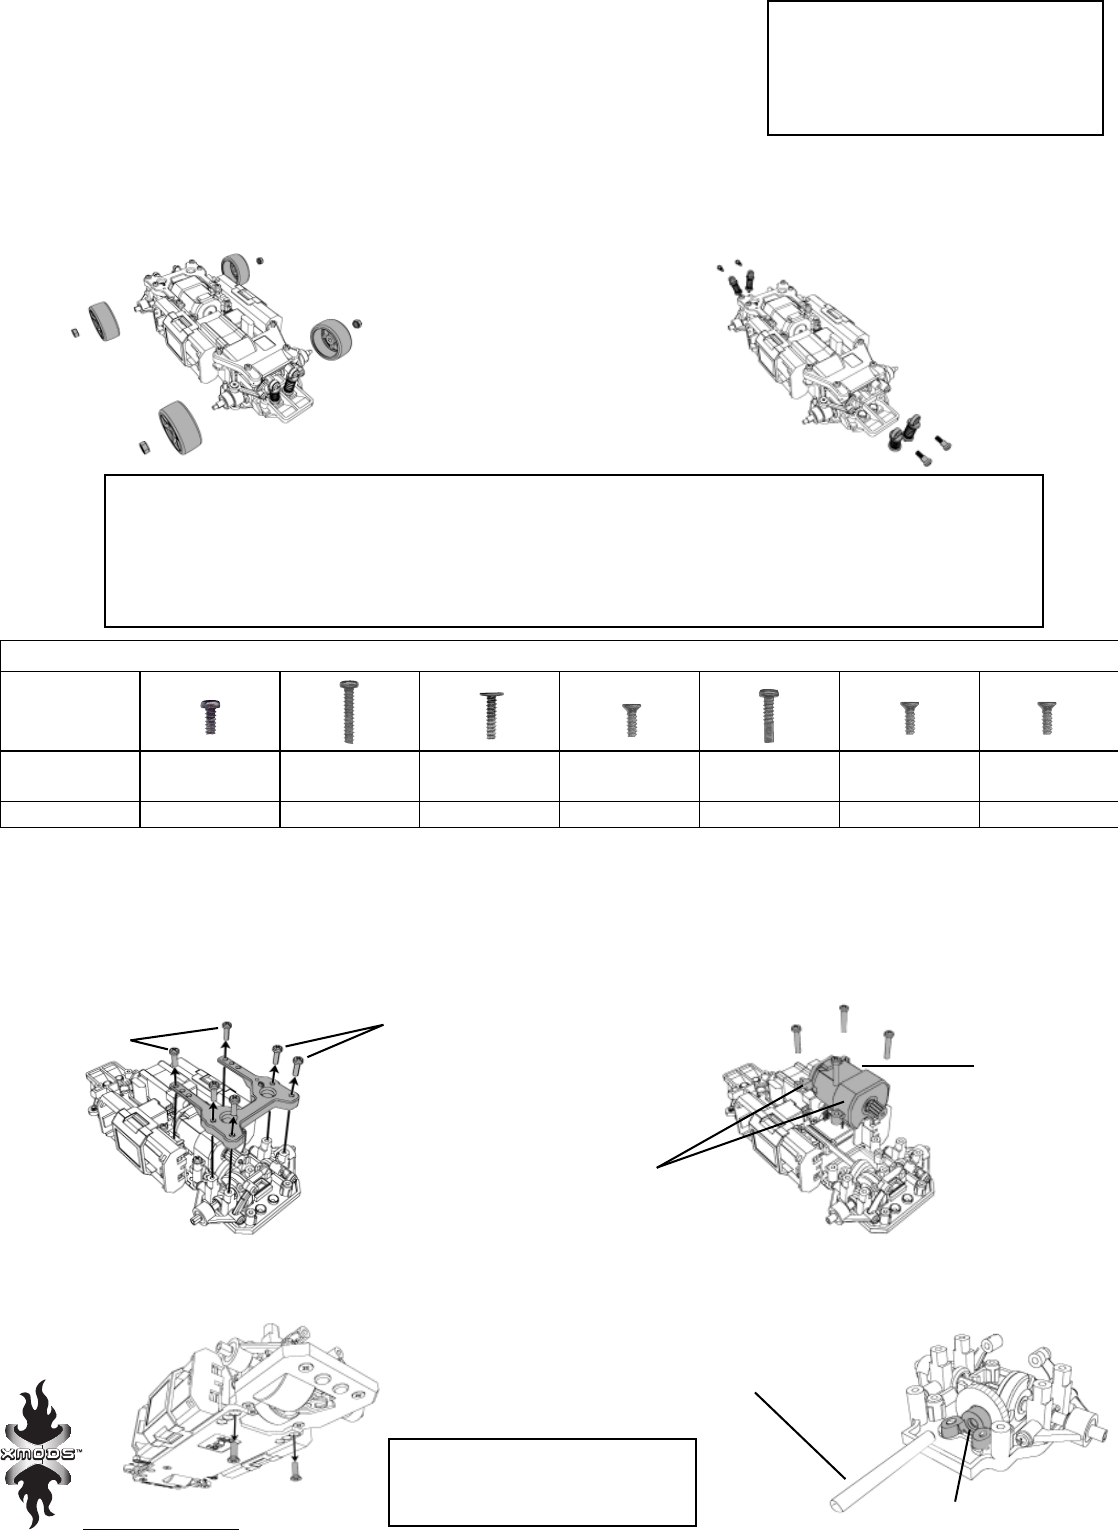
Screw Guide (Rear of Car)
Screw
Location
Rear Upper
Deck (short)
Rear Upper
Deck (long)
Motor
Holders
Rear Lower
Deck
Rear Support
Arms
Rear Lower
Deck
Rear Center
Shaft Holder
Quantity
4 2 4 2 4 4 2
XMODS
TM
Custom RC
Metal Bearing Upgrade 60-8512
Upgrade from standard plastic bushings to metal ball bearings for reduced friction,
greater precision, and better handling. Before installing, turn off your vehicle and
controller and then detach the car body.
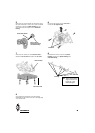
1
Use the lug wrench supplied in your XMODS
TM
Starter Kit
to detach the front lug nuts and wheels.
2
Loosen and remove each damper screw and detach
the right and left front and rear dampers.
Preparing for Your Metal Bearing Upgrade
Tips
• Carefully count and set aside screws while disassembling so you can properly reassemble your car later.
• Bearings can be fitted in place in either direction.
• Be careful that the lead solder joints inside the car do not become detached.
• You may find it useful to remove the antenna from the chassis.
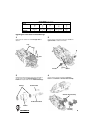
1
Remove six screws (2 long, 4 short) from the rear upper
deck to detach it.
4
Remove the rear lower deck from the chassis.
Motor Holders
Motor
2 long screws
4 short screws
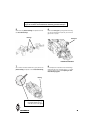
Center Shaft
Center Shaft Holder
Upgrading the Rear Section to Metal Bearings
3
Remove two screws from the rear lower deck.
Tip: When reassembling, align
the center shaft’s D-cut
with the D-cut in the gear.
Tip: For best performance and fit,
before installing bearings,
lightly brush each shaft with
fine sandpaper to remove
burrs and blemishes.
2
Diconnect the motor connector. Remove two
screws from each motor holder and remove the
motor holders and motor.