


www.xmodsRC.com
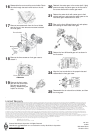
12
Place the center gear back on
the center shaft. Lightly press
and rotate the center gear so the
flat side of the center shaft and
the center gear mesh.
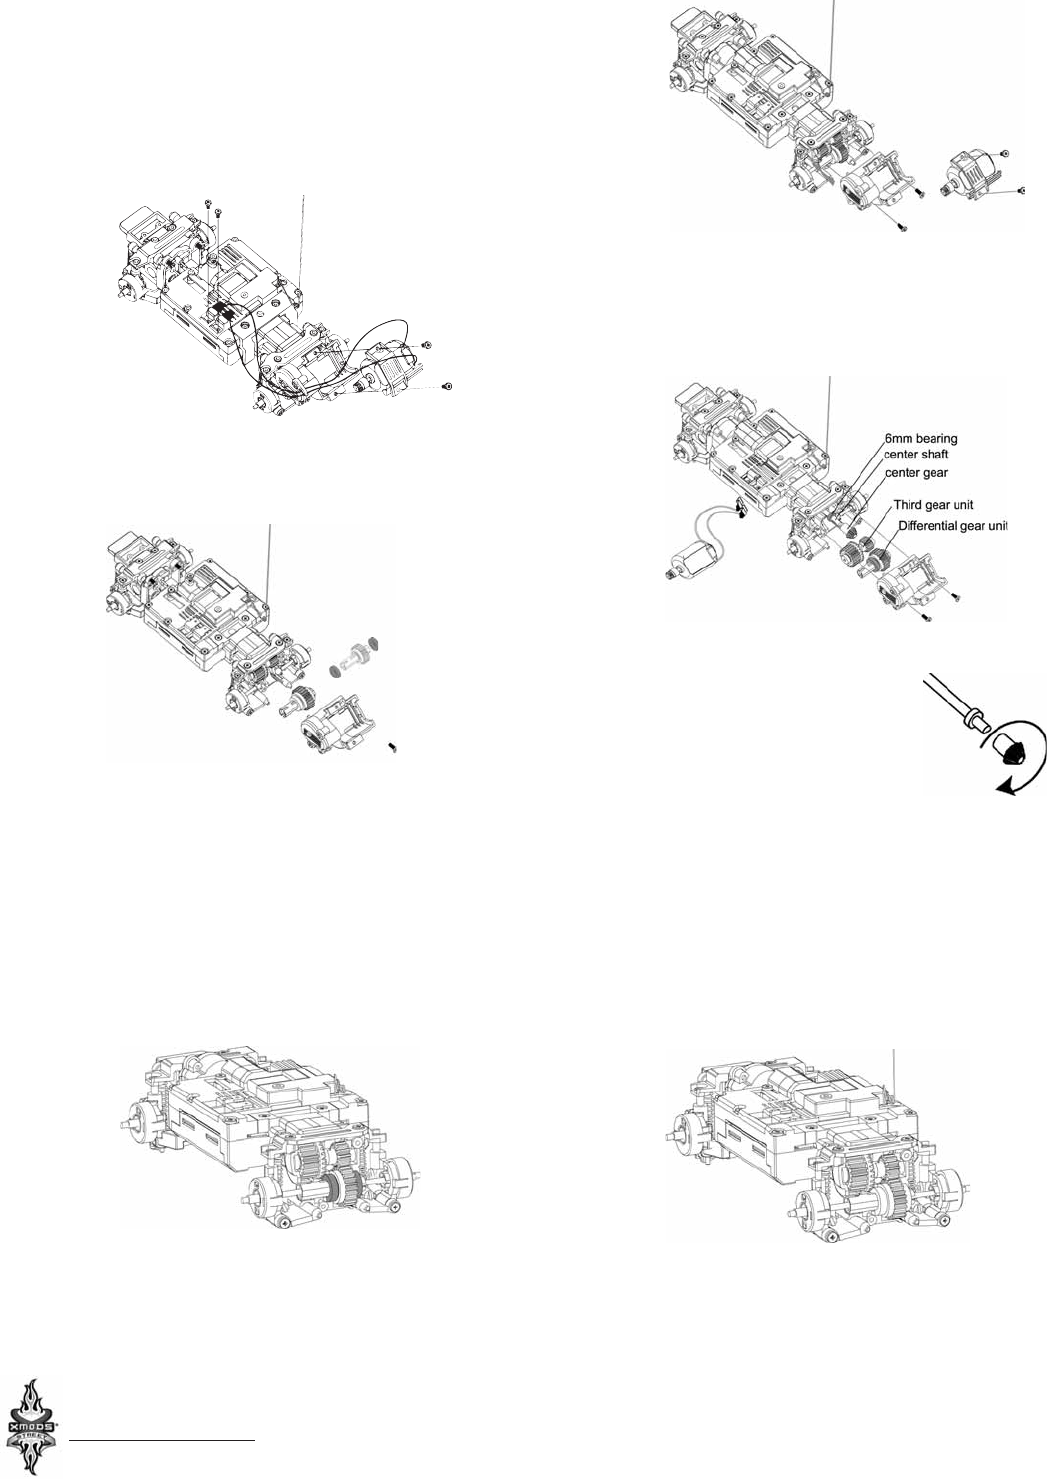
13
Restore the center shaft with center gear into the
original position and rotate center gear so the front
center gear meshes with the shaft.
14
Reinstall the third gear, then align the drive shafts
and restore the rear differential gear unit as shown.
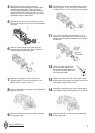
11
If you have installed the All Wheel Drive kit:
Remove the center gear and the center shaft and
replace the small bearing. Tweezers may be helpful
for this step.
15
Align the shafts of the rear arms and reassemble
the rear gear case.
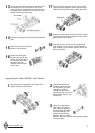
7
Replace the bearing on its both ends of the
differential gear. If you have installed the All
Wheel Drive kit, skip to Step 11.
8
Align the drive shaft and restore the rear differential
gear unit as shown.
9
Align the shafts of the rear arms and re-assemble
the rear gear case.
6
Remove the two screws on the rear drive unit
to remove the rear gear case. Then, remove the
differential gear and the third gear.
10
Re-assemble the motor, the motor holder, and the
motor connector. If you have NOT installed the
All Wheel Drive kit, this completes the upgrade.
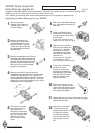
4
Align the drive shaft to the joint cup and
reassemble the wheel shafts with the drive shaft
installed into the knuckles. Then, replace the
knuckle caps/disk brakes and wheels. Unless you
have installed the All Wheel Drive kit, your front
wheels do not have a drive shaft/joint cup, so just
reassemble the front wheel shaft.
5
Remove the two screws on the motor connector
and the two screws on the motor cover and detach
the motor.
3