


Limited Warranty
This product is warranted by RadioShack against manufacturing
defects in material and workmanship under normal use for
ninety (90) days from the date of purchase from RadioShack
company-owned stores and authorized RadioShack franchisees
and dealers. EXCEPT AS PROVIDED HEREIN, RadioShack MAKES
NO EXPRESS WARRANTIES AND ANY IMPLIED WARRANTIES,
INCLUDING THOSE OF MERCHANTABILITY AND FITNESS FOR
A PARTICULAR PURPOSE, ARE LIMITED IN DURATION TO THE
DURATION OF THE WRITTEN LIMITED WARRANTIES CONTAINED
HEREIN. EXCEPT AS PROVIDED HEREIN, RadioShack SHALL
HAVE NO LIABILITY OR RESPONSIBILITY TO CUSTOMER OR ANY
OTHER PERSON OR ENTITY WITH RESPECT TO ANY LIABILITY,
LOSS OR DAMAGE CAUSED DIRECTLY OR INDIRECTLY BY USE
OR PERFORMANCE OF THE PRODUCT OR ARISING OUT OF ANY
BREACH OF THIS WARRANTY, INCLUDING, BUT NOT LIMITED TO,
ANY DAMAGES RESULTING FROM INCONVENIENCE, LOSS OF
TIME, DATA, PROPERTY, REVENUE, OR PROFIT OR ANY INDIRECT,
SPECIAL, INCIDENTAL, OR CONSEQUENTIAL DAMAGES, EVEN IF
RadioShack HAS BEEN ADVISED OF THE POSSIBILITY OF SUCH
DAMAGES.
Some states do not allow limitations on how long an implied
warranty lasts or the exclusion or limitation of incidental or
consequential damages, so the above limitations or exclusions
may not apply to you.
In the event of a product defect during the warranty period,
take the product and the RadioShack sales receipt as proof of
purchase date to any RadioShack store. RadioShack will, at its
option, unless otherwise provided by law: (a) correct the defect
by product repair without charge for parts and labor; (b) replace
the product with one of the same or similar design; or (c) refund
the purchase price. All replaced parts and products, and products
on which a refund is made, become the property of RadioShack.
New or reconditioned parts and products may be used in the
performance of warranty service. Repaired or replaced parts and
products are warranted for the remainder of the original warranty
period. You will be charged for repair or replacement of the
product made after the expiration of the warranty period.
This warranty does not cover: (a) damage or failure caused by or
attributable to acts of God, abuse, accident, misuse, improper or
abnormal usage, failure to follow instructions, improper installation
or maintenance, alteration, lightning or other incidence of excess
voltage or current; (b) any repairs other than those provided by a
RadioShack Authorized Service Facility; (c) consumables such
as fuses or batteries; (d) cosmetic damage; (e) transportation,
shipping or insurance costs; or (f) costs of product removal,
installation, set-up service adjustment or reinstallation.
This warranty gives you specific legal rights, and you may also
have other rights which vary from state to state.
RadioShack Customer Relations
300 RadioShack Circle, Fort Worth, TX 76102 12/99
www.radioshack.com
08A08
60-437
INS-3271-US-00
Printed in China
©2008 RadioShack Corporation
All Rights Reserved.
XMODS is a registered trademark used by RadioShack Corporation.
www.xmodsRC.com
XMODS
®
Wheel Upgrade Kit 60-437
Thank you for purchasing your wheel upgrade kit from RadioShack. Please read this user’s guide before
installing, setting up, and using your new product.
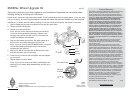
Customize your vehicle with high performance wheels. This kit includes three kinds of custom wheels, 12 lug nuts, and
one lug nut wrench, plus two front disc brakes and two rear disk brakes (first generation XMODS only). Each wheel set
includes four (4) wheels with tires. Before installing, turn off your vehicle and controller, and detach the car body.
1. Use the supplied lug nut wrench to detach the lug nuts from each wheel.
2. Remove a wheel from the axle.
3. Place a tire on the new wheel.
Note: You can use the tires that come with your starter kit.
If you own the first generation Mustang or Camaro or 65
Mustang, use the tires included in this kit, since these car
models have different tire diameters.
4. Snap the disc brakes onto the axle. The larger brakes go on
the front axle, the smaller brakes go on the rear axle.
Note: If your car is one of the EVO XMODS series, you cannot
use the disk brakes supplied with this kit. Use the ones
supplied with your starter kit.
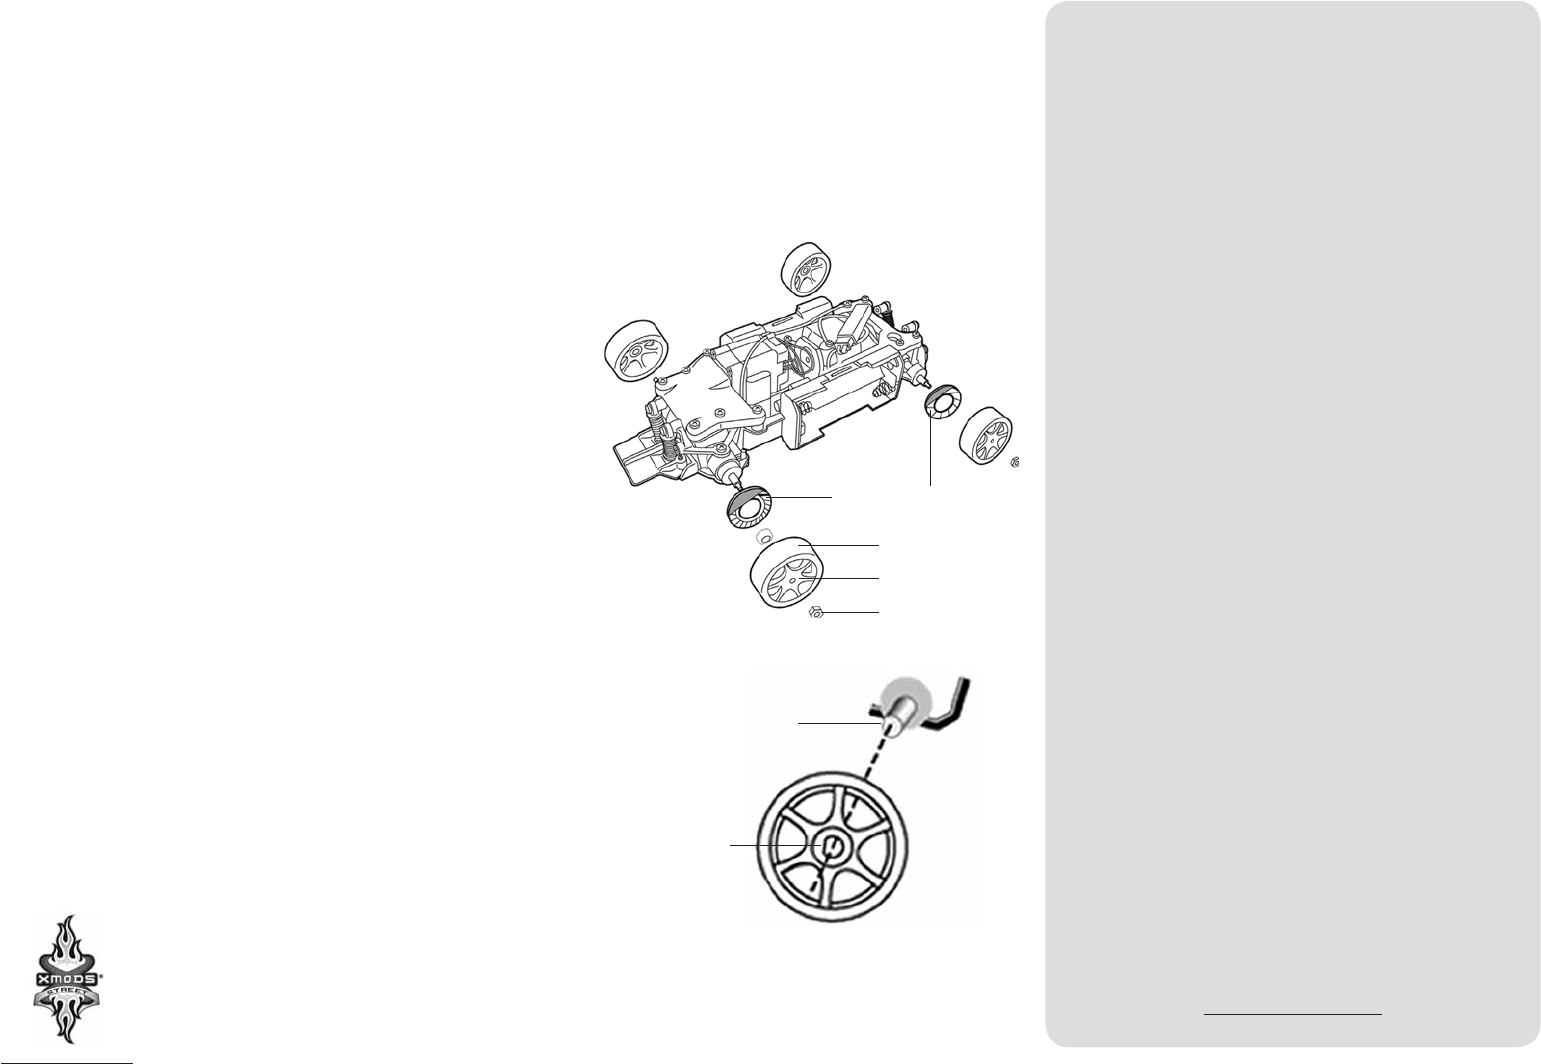
5. Align the flat side of the wheel with the flat side of the axle
and slide the wheel onto the same axle.
6. Screw the lug nut onto the axle and tighten with the supplied
lug nut wrench.
7. Repeat steps 2-6 for each wheel.
Note: If your car is a Lancer and Firebird, wheel spacers are
attached to your wheels. When disassembling, be sure not to
lose them.
Flat side of axle
Flat side
of wheel
Tire
Wheel
Lug nut
Disc brakes
M
to
O
P
to
R