


RadarHAWK™ SBIII - Page 11
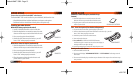
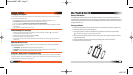
The RadarHAWK™ SBIII can easily be installed on your windshield, visor, or dashboard. Each
location has it’s own installation hardware and requirements.
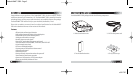
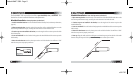
Windshield Installation - Battery Operation (use Bracket A)
1. Install 2 AA alkaline batteries into the windshield bracket A battery box (see Battery Information,
page 15).
2. Adjust mounting bracket. Bend the angle of the metal bars of the windshield bracket to set the
best viewing and detection angle, ensuring the radar detector is level with the road.
3. If suction cups are not installed in the bracket, insert the nipples of the suction cups into the back
of the battery box.
4. Secure to windshield. Press the bracket rmly against the windshield until the suction cups take
hold securely.
5. Mount the radar detector onto the plastic piece at the end of the bracket. You will hear a “click”
when the two parts are properly connected.
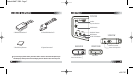
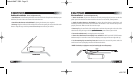
Windshield Installation - Power Cord Operation (use Bracket B)
1. Adjust mounting bracket. Bend the angle of the metal bars of the windshield bracket B to set the
best viewing and detection angle, ensuring the radar detector is level with the road.
2. If suction cups are not installed in the bracket, insert the nipples of the suction cups into the
windshield bracket.
3. Secure to windshield. Press the bracket rmly against the windshield until the suction cups take
hold securely.
4. Mount the radar detector onto the plastic piece at the end of the bracket. You will hear a “click”
when the two parts are properly connected.
5. Power-up. Plug the small end of the coiled power cord into the power jack on the side of the radar
detector. Plug the large end of the power cord into the power socket of your vehicle.
v.051707