


70
PTO SYSTEM
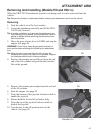
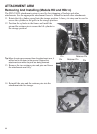
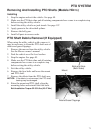
Removing And Installing PTO Shafts (Models HDPTO)
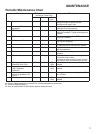
6. Remove the four bolts and nuts and remove the
guard.
Bolt Installation Torque: 32-35 ft-lbs (43-47 Nm)
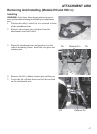
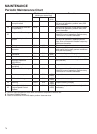
7. Remove the four bolts and nuts and remove the
PTO shaft carrier assembly. (The carrier assembly
will need to be slide off the PTO shaft splines).
Bolt Installation Torque: 32-35 ft-lbs (43-47 Nm)
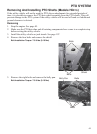
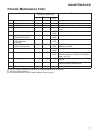
8. Remove the passengers seat to access the bolts for
the rear of the PTO shaft. Remove the four bolts
and remove the PTO shaft from the PTO clutch.
Bolt Installation Torque: 18-19 ft-lbs (24-26 Nm)
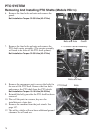
9. Reinstall the belly pan after the PTO shaft has been
removed.
10. Place all the parts in a secure, dry area for
installation at a later date.
11. Remove the machine from the jack stands. See
page 107.
12. The utility vehicle will now have additional ground
clearance for off road use.
Bolts and Nuts
Guard
Bolts and Nuts
PTO Shaft Carrier Assembly
Bolts
PTO Shaft