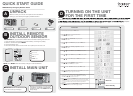
UNPACK
Make sure that you have all of the parts shown here before
setting up your Desktop Emergency Weather Station.
A
INSTALL MAIN UNIT
C
INSTALL REMOTE
OUTDOOR SENSOR
B
QUICK START GUIDE
WR606 Desktop Emergency Weather Station
Desktop Emergency
Weather Station
1×
THGN132N Remote
Outdoor Sensor
1×
UM-3 (AA) 1.5V
batteries
4×
7.5V Adaptor
1×
LED status indicator
Wall mount hole
1
2
Battery compartment
3
RESET hole
4
CHANNEL switch
5
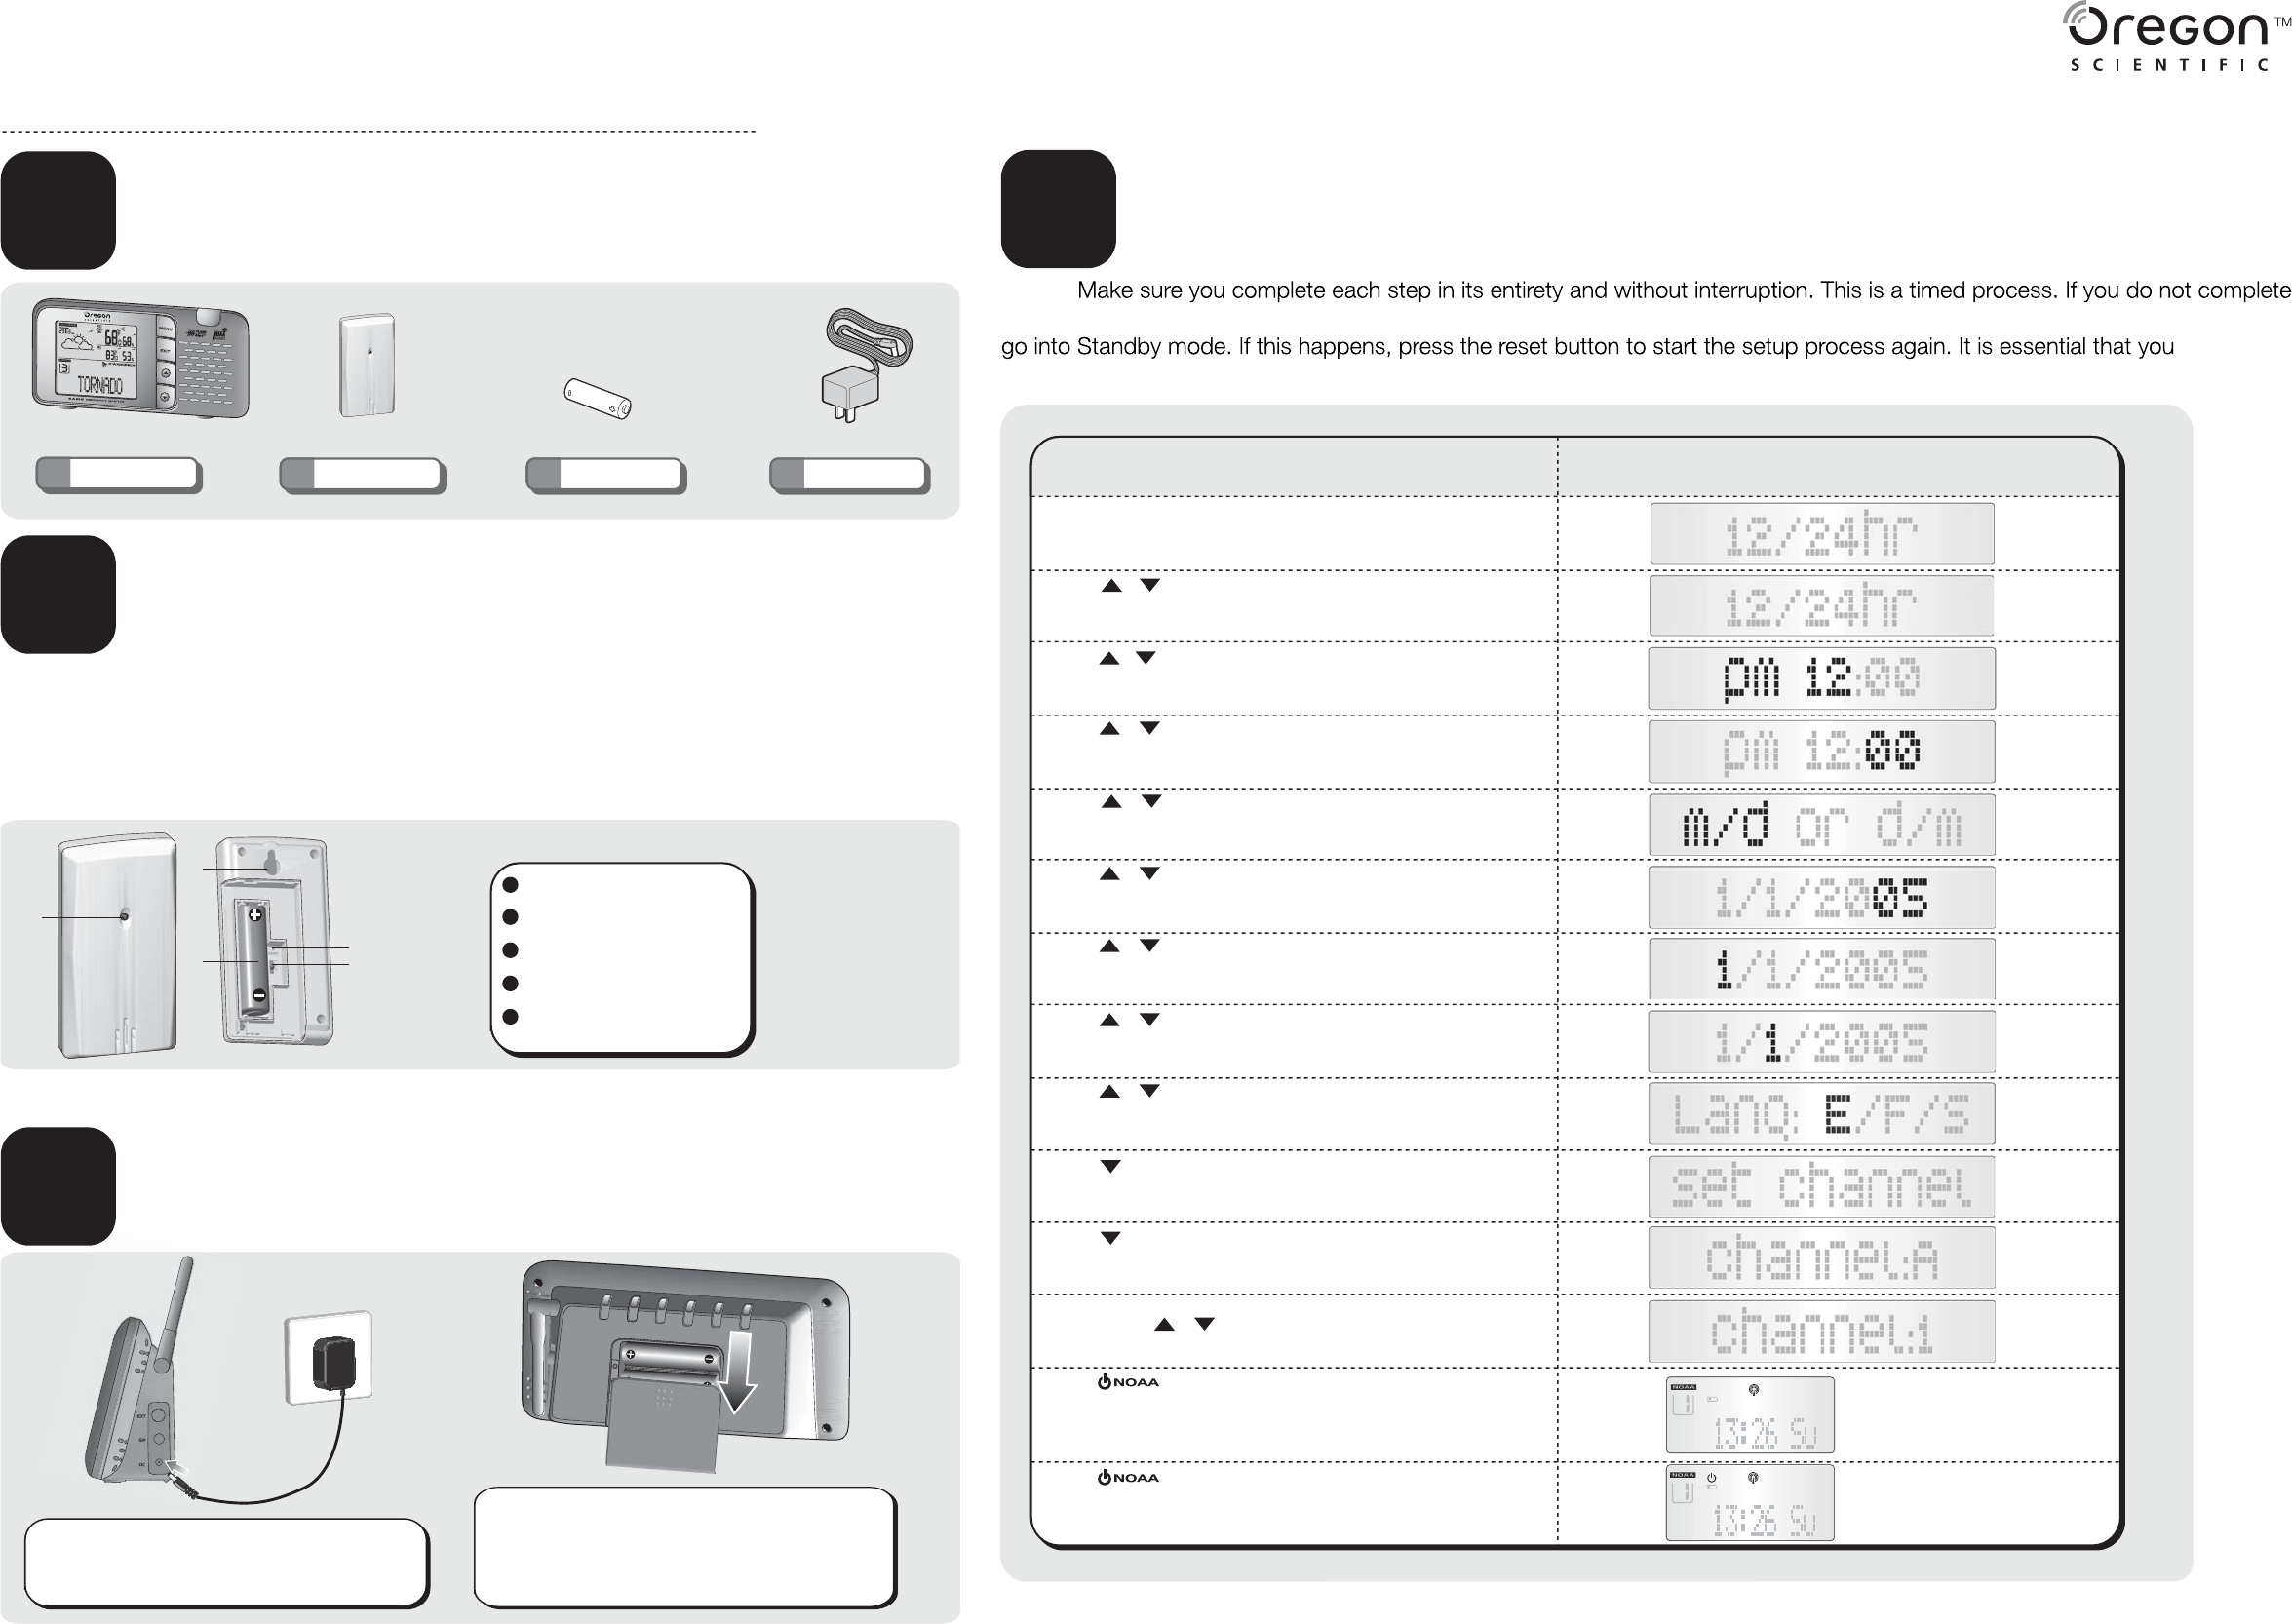
NOTE:
each step in order and confirm each setting within one minute, the WR606 will automatically exit the setup process and
this setup process to ensure your unit is ready to receive all warning messages.
TURNING ON THE UNIT
FOR THE FIRST TIME
D
Open the battery cover and press the RESET button.
Press or to select 12 or 24 time format and then
press the MENU button to confirm.
Press or to select PM/AM HOUR setting and press the
MENU button to confirm.
Press to select MINUTE setting and press the MENU button
to confirm.
Press to select month/day or day/month and press the
MENU button to confirm.
Press to select YEAR and press the MENU button to confirm.
Press to select MONTH and press the MENU button to confirm.
Press to select DAY and press the MENU button to confirm.
Press to select LANGUAGE (E=English / F=French /
S=Spanish) and press the MENU button to confirm.
Press to select “Set Channel” Mode and press MENU
to select.
P
ress
to select "Auto" channel seeking and press the EXIT
and press
button to confirm
EXIT button again to get back to time mode.
If you know the specific Channel (1 through 7) that is applicable to your
location, press to select. Press the EXIT button
to confirm and
EXIT button again to get back to time mode.
Press to switch to the NOAA ON mode.Your radio will
automatically search
hear the 24-hour weather
found the appropriate channel.
weather broadcast will start
Press
to switch to the NOAA STANDBY mode. The radio
is in Standby
ON when a NOAA alert message is received.
yalpsiD DCLnoitcurtsnI
NOAA On
NOAA Standby
IMPORTANT Set up the remote outdoor sensor first before setting the main unit.
1. Open the battery compartment and insert battery, matching the polarity.
2. Select a channel then press RESET.
3. Close the battery door.
4. Place the remote outdoor sensor within 30 m (98 ft) from the main unit.
NOTE Press RESET after each battery change or channel selection.
1
2
3
4
5
or
or
or
or
or
or
or
press
the appropriate channel that is in your area. Once you
broadcast on your radio, your radio has successfully
If you set your channel manually, the 24-hour
immediately.
switch to
Batteries serve as back-up only. Use 3 pieces
of AA (UM-3) 1.5V batteries. Insert batteries,
matching the polarity. Press RESET after each
battery change.
IMPORTANT Use the 7.5V AC/DC adaptor
as the main source of power supply.
complete
and will