


Routes 39
Routes
There are two types of routes that are commonly used in the Magellan Triton, Go To route and Multileg
route. A third type of route, Backtrack route, is also commonly used and is described in the chapter
on Trails.
A Go To route is the simplest route possible. It begins at your current location and goes to a single
destination you select. This is often referred to as a single leg route. An example would be you are at
your camp and want to go back to a scenic area you saved as a waypoint during your last hike. You
would create a Go To route by selecting the waypoint for the scenic area as the destination. The
Magellan Triton would then plot a straight line from your location to the destination waypoint and
provide you with updated information as you travel to get you to your destination. As you hike, the
Magellan Triton continuously updates the information giving you the best possible directions to get
you to your destination.
A Multileg route is a series of Go To routes strung together. Using the same scenario as above, only
this time you want to go to get supplies first and you know the position of a bridge you need to cross.
For this route it would go from your current location, to the store, to the bridge and finally to the
scenic spot. This multileg route consists of three Go To routes. Once the route is activated, the
Magellan Triton will begin providing navigation information to get you to the store. After arriving at
the store it will automatically begin providing information to get you to the bridge, and then the scenic
spot. Another useful feature of multileg routes is that they can be saved into memory and used over
and over.
Tip: If you want to save a single leg go to route into memory, use the Create Route function and
create a route with one leg.
Go To Routes
Creating a Go To Route Using the Pan Cursor
This method provides you a way of looking at the map and moving the cursor to the point on the
map you want to go to without requiring that you have latitude and longitude information for the
destination.
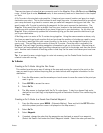
1. From the Map screen, use the arrow keys or touch screen to move the cursor to the point you
want to go to.
2. Press ENTER to access the menu.
3. Select Go To.
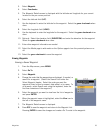
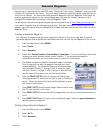
4. The Map screen is displayed with the Go To route shown. A start icon (green flag) and a
destination icon (red flag) is displayed along with a Destination Position Line connecting the
two flags.
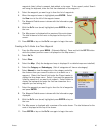
Creating a Go To Route to a Saved User-Created Waypoint.
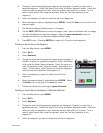
1. From the Map screen press MENU. (Alternate Method: Press and hold the GO TO button
while the present position cursor is displayed on the Map screen.)
2. Select Go To.
3. Select Waypoint.
4. If needed, change the order that the waypoints are displayed or search for a waypoint.
(Select the Search field under the Select Waypoint header. Select the order you want the