


Using the eXplorist with MapSend
76
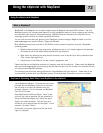
The process for transferring from from MapSend to the eXplorist is similar to the one described above.
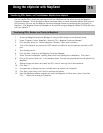
1. Open the MapSend software program. This procedure will discuss sending waypoints to the eXplorist.
Use similar steps for transferring routes and tracks.
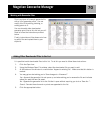
2. Click the Place Waypoint icon at the top of the MapSend display to bring up the Waypoint List.
3. All waypoints in the list will be transferred, including those not checked.
4. From the Waypoint Menu, select ‘Save to File...’. Enter a name for the file and click Save.
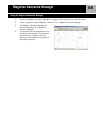
5. Access the Magellan Conversion Manager by using the Start button on the Windows toolbar. Under
“Programs” select ‘Magellan > eXplorist 210 > Magellan Conversion Manager’.
6. Click the radio button for ‘Convert Waypoints / Routes / Tracks’ and click Next >.
7. Turn off the eXplorist and connect the USB cable to the eXplorist and the personal computer’s USB
port.
8. Turn the eXplorist on. Press ENTER. From the Communications screen, highlight File Transfer and
press ENTER.
9. Click the Next > button on the Magellan Conversion Manager.
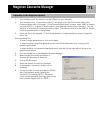
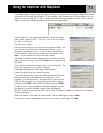
10. Select ‘Convert to eXplorist’ (sending data points from MapSend to the eXplorist) Click Next >.
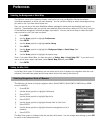
11. Click on the active folder icon. In the example shown,
files are being transferred from MapSend to the eXplorist.
12. Browse through the folders to find the waypoint files to be
transferred.
13. Click Next >.
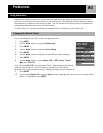
14. A progress bar is displayed and will indicate when the
transfer has completed.
15. Click Next > and finally click Finish to conclude the
transfer.
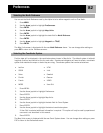
16. The next time you access My Points of Interest, you will
be able to select the file that was just uploaded.
Transferring Waypoints, Routes, and Tracks from MapSend