


Routes
46
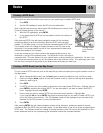
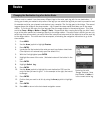
This will create a GOTO route to a map object (city, highway, user POI, etc.) that you have indicated by moving
the crosshair cursor on the Map screen over the map object.
1. While viewing the Map screen, use the Arrow joystick causing the eXplorist to go into Cursor mode.
2. Continue using the Arrow joystick to move the crosshair cursor to the map object that you want to go to.
3. Press ENTER.
4. Use the Arrow joystick to highlight the map object that you want to use as the GOTO. (Some areas of
the map may have multiple map objects in the same location.)
5. Press ENTER.
6. Use the Arrow joystick to highlight Goto.
7. Press ENTER.
8. If a GOTO is active, you will be asked to deactivate it and create a new GOTO route. Highlight Yes and
press ENTER.
After pressing ENTER, the last viewed navigation screen will be displayed, updated as needed to provide
information about the GOTO route you have created. On the Map screen, a line will be drawn representing the
GOTO route. The Compass screen will change to display the name of the POI used as the destination in the
screen header bar and an icon representing the destination outside the compass diameter.
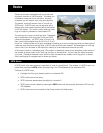
Multi-leg routes can be used to navigate to a final destination using multiple legs. An example would be
leaving the dock, motoring over to buoy 1, then the bait boat and finally to a fishing hot spot. This route would
go from Dock to Buoy 1,Buoy 1 to Bait, Bait to Fish.
Features of a multi-leg route:
• Multi-leg routes can be saved in memory. (Each saved route can have up to 29 legs in the route.)
• Multi-leg routes remain active even after the eXplorist has been turned off.
• Multi-leg routes can be edited, reversed, deleted or viewed on the map.
• When a multi-leg route is active, you can switch which leg will be used as the next destination point.
In the above example, you could skip going to Buoy 1 by selecting the Bait leg when the route is
active.
Creating a GOTO Route to a Map Object
Multi-Leg Routes