C
C-3190_INST_9-07
INSTALLATION INSTRUCTIONS
C-3190 SLIDE-OUT RADIO TRAY
1996-2008 FORD CROWN VICTORIA
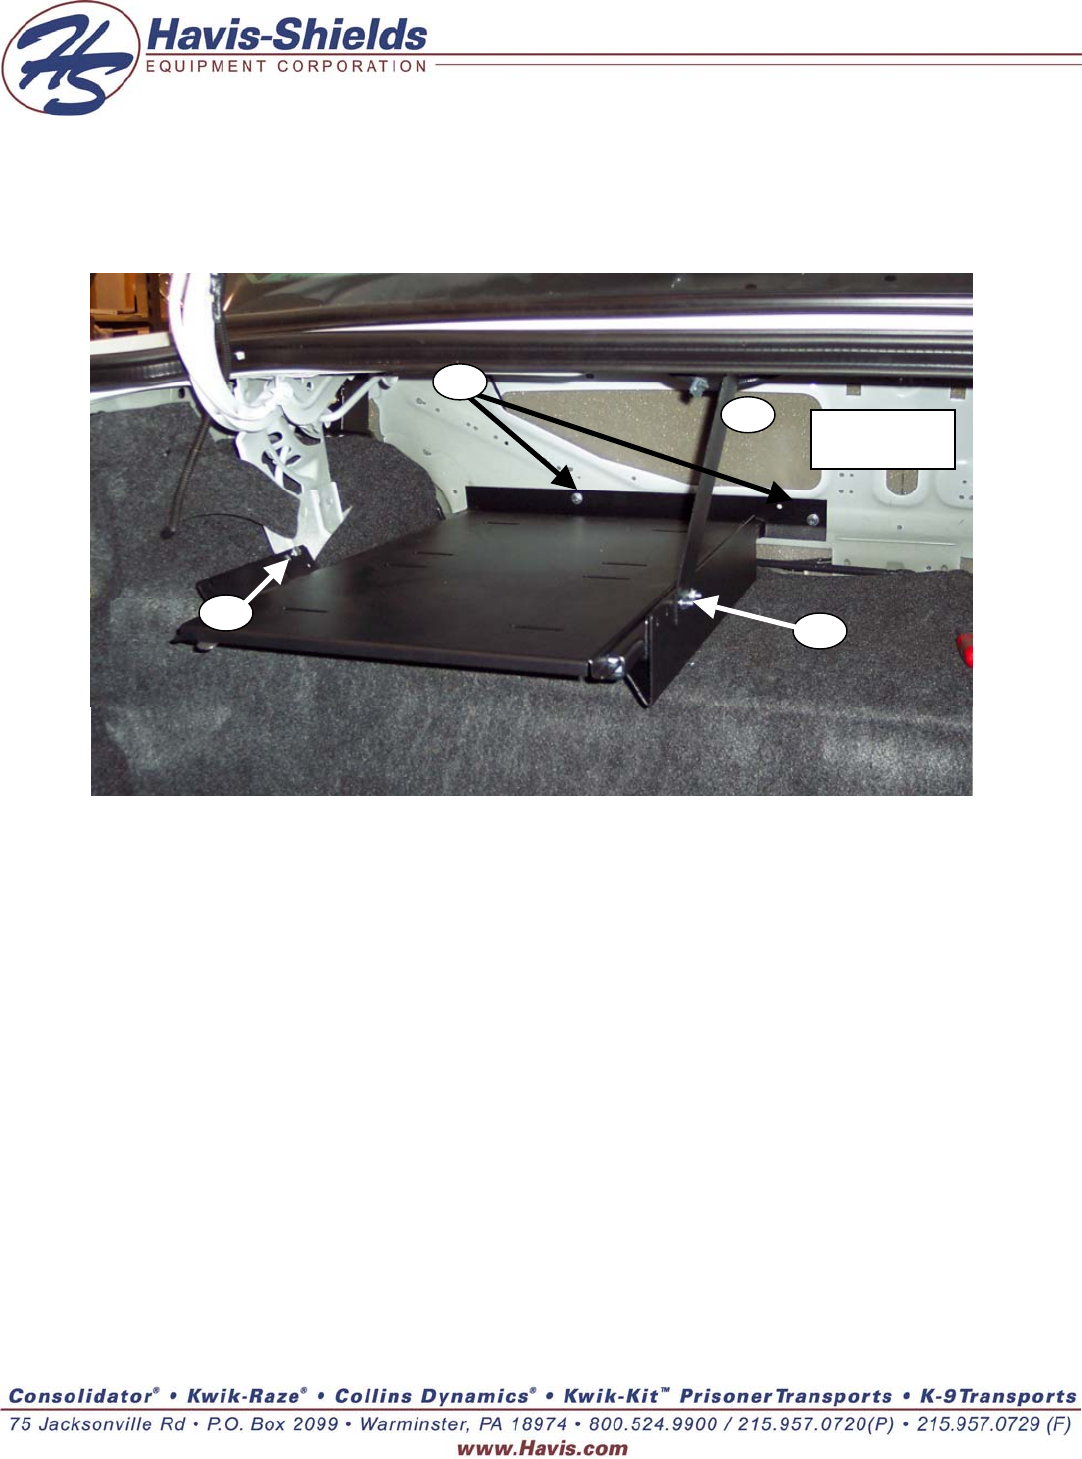
Step 3. Insert 2 (two) 1/4” x 1” hex
head cap screws in shelf holes.
Place bottom support bracket over
hex head cap screws, then place
hanger support bracket on top of
bottom bracket. Place 2 (two) 1/4"
flat washers and 2 (two) 1/4" flange
nuts. 1998 Crown Vic: use pair of
holes toward front of vehicle. For
1997 Crown Vic: use holes toward
rear of vehicle.
Step 4. Using the support as a
template, mark and drill two holes in
upper deck. Bolt support bracket on
with 1/4” x 1” hex head cap screws,
2 (two) 1/4” flat washers, and 1/4”
flange nuts. Make sure shelf is
level and tighten all hardware.
Tools needed: 7/16” wrench and
socket, drill and 1/4” bit, level.
Hardware Included: 8 (eight) 1/4”
x 1” screws, 8 (eight) 1/4” flange
nuts, 8 (eight) 1/4” flat washers.
Note: Do not substitute hardware.
Do not use self-tapping screws as
they will vibrate loose.
Step 1. Align forward radio shelf
bracket with existing holes in front
of trunk wall. Use 2 (two) 1/4” x 1”
hex head cap screws, 2 (two) 1/4”
flat washers and 2 (two) 1/4”
flange nuts. Don’t fully tighten
bracket yet.
Step 2. Use a block of wood or a
shim to level radio shelf. Drill 1/4”
hole into trunk hinge, support base
on driver’s side. Fasten down shelf
using 1 (one) 1/4” x 1” hex head
cap screw, 1 (one) 1/4” flat
washer, and 1 (one) 1/4” flange
nut.
Back Seat
Wall


