


Page 4 For technical questions, please call 1-800-444-3353. SKU 69686
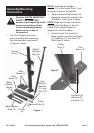
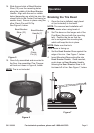
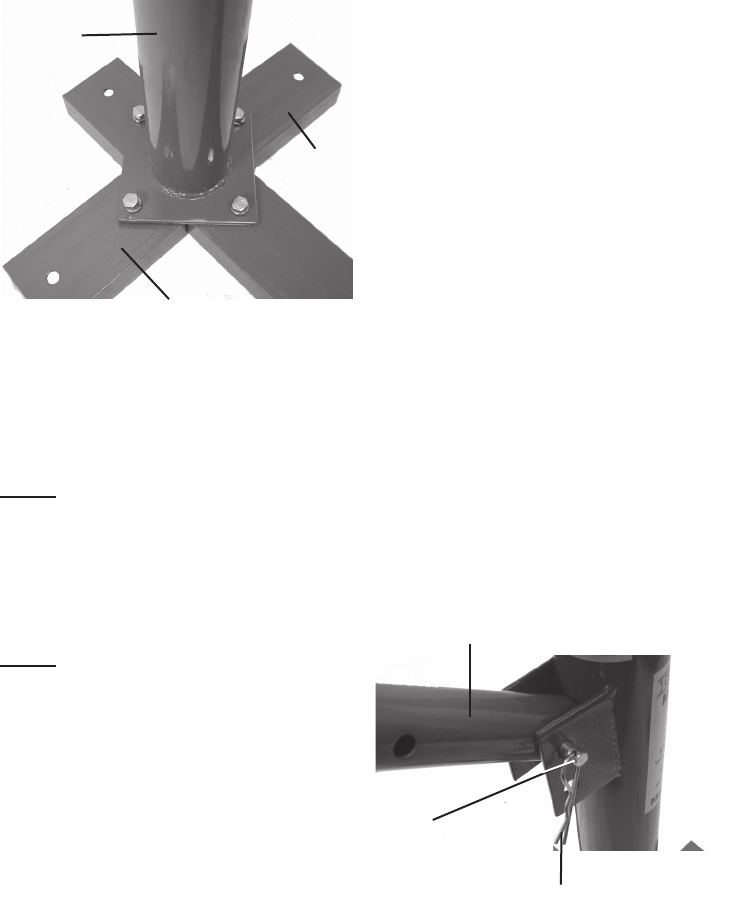
4. Set each of the Side Bases (9) along
either side of the Post Base until the
holes align. Fasten together using
the Hex Bolts (6), Washers (11), and
Nuts (12). See Figure 3, below.
Side
Base (9)
Side
Base (9)
Center
Post (1)
Figure 3
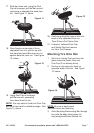
5. At this point, the assembled base
should be mounted to the selected
oor surface (such as a wood pallet
or concrete oor) using the 7/16 IN.
mounting holes at the ends of the
Side Bases and the Post Base.
NOTE: The oor surface should
be at least 4 IN. in depth.
6. With assistance, move the Tire
Changer to the selected location.
Use the four 7/16 IN. mounting holes
as templates to mark four 7/16 IN.
holes on the mounting surface.
NOTE: If mounting to a concrete
surface, do not use a concrete drill bit
larger in diameter than 7/16 IN.
7. Drill four holes in the oor surface
equal to the length of four 7/16 IN.
diameter anchors (not included)
to secure the Tire Changer.
8. Set the Tire Changer back on the oor
surface and align its four mounting
holes at its base with the four pre-
drilled holes in the oor surface.
9. If necessary, level the Tire Changer on
the oor surface using a carpenter’s
level and steel shims (neither included).
10. Use a hammer (not included) to
tap the four anchors through the
four mounting holes in the base of
the Tire Changer and into the oor
surface. Continue tapping the anchors
until their washers rest against
the base of the Tire Changer.
11. Firmly tighten the nuts of the
four anchors to secure the Tire
Changer to the oor surface.
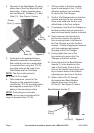
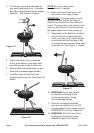
12. Place the end of the Bead Breaker
Handle (7) in the bracket on the
side of the Center Post until the
hole on the Handle’s end aligns with
top or bottom holes of the bracket
(depending on the size of the tire.)
13. Slide a Clevis Pin (5) through
the bracket and Bead Breaker
Handle, securing it using the
R-Clip (8). See Figure 4, below.
Clevis
Pin (5)
R-Clip (8)
Bead Breaker Handle (7)
Figure 4