To stop or resume the current route:
1. Press the MENU key, highlight Route Options, and press OK. A Route
Options menu appears.
2. Highlight Stop Navigation or Resume Navigation, and press OK to
stop or start the active route.
To add via points (extra stops) during a route:
1. Press the MENU key, highlight Route Options, and press OK. A Route
Options menu appears.
2. Highlight Vias, and press OK. An information page for your current
route appears.
3. Use the Rocker pad to highlight the Via Points box, and press OK.
4. Highlight <Select to add via point>, and press OK. A window appears
with three options for finding your location.
5. Select one of the three options. Once you select an option, the new via
point appears on your route page.
6. To add more via points, repeat steps 4 and 5 above.
7. Highlight Navigate, and press OK when you are done. Your original
route is automatically recalculated to include the newly-added via
point(s).
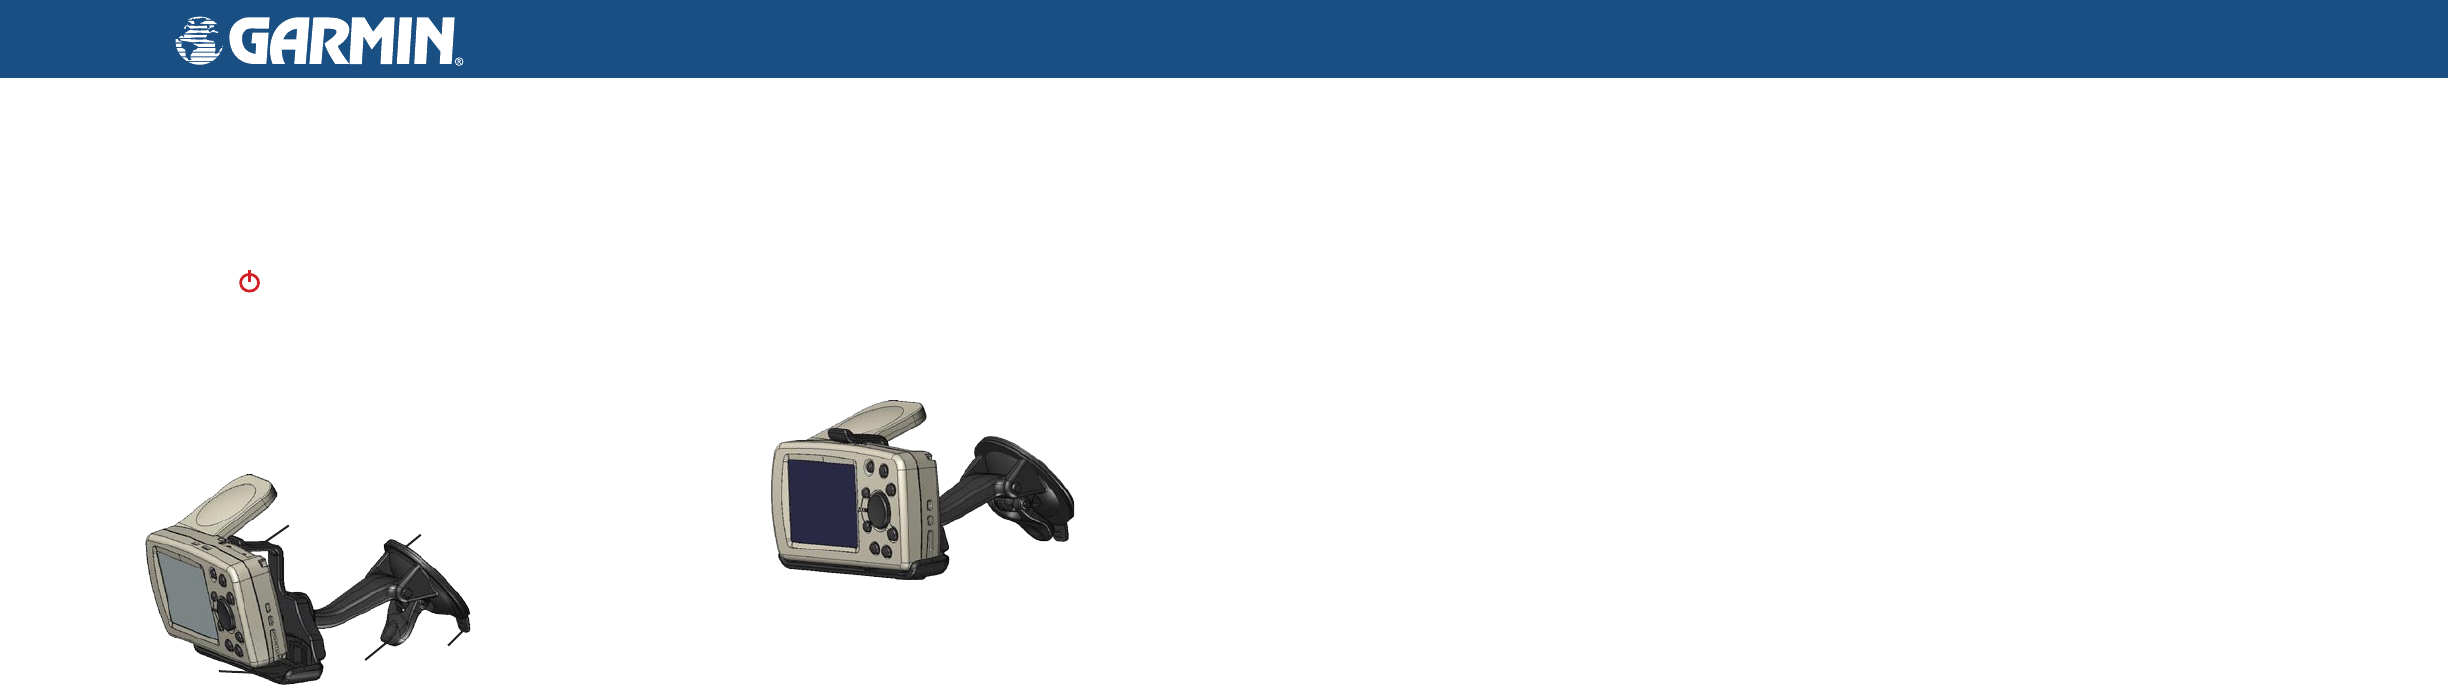
To install the vehicle suction cup mount:
1. Align the ball on the end of the suction mount with the socket (hole)
on the back of the cradle. Press firmly to snap the mount and cradle
together.
2. Flip up the antenna on the back of the unit. Angle the Quest forward
and fit the bottom of the Quest into the cradle. Tilt the unit back until it
snaps in place.
3. To ensure a tight grip, clean and dry your windshield before you mount
the suction cup. Flip the lever on the suction cup toward you.
4. Place the suction cup on your windshield. Flip the lever back, toward
the windshield.
5. Plug the power cable into an available receptacle.
NOTICE TO STATE OF CALIFORNIA DRIVERS: California Vehicle Code Section 26708 (a) (1) provides
that drivers in California should not use suction mounts on their windshield or side or rear windows. Other Garmin
dashboard or friction mounting options should be used. For available accessories, refer to the Garmin Web site at
www.garmin.com. Also, refer to the Owner’s Manual
for instructions on using the included mounting disk with the
suction cup mount.
© Copyright 2006 Garmin Ltd. or its subsidiaries
January 2006 1
90-00556-11 Rev. A Printed in Taiwan
Finding Places and Routing to Them
To find a place and route to it:
1. Press the FIND key. A Find page appears.
2. Highlight an option that will help you find your destination, such as Auto
Fuel, Food & Drink, or Lodging. Press the OK key. A list of places near
your current location appears.
3. Highlight the place you wish to visit, and press OK. An information
page appears. (If you know you will want to visit this place again, select
Save to add it to your My Locations list.)
4. Highlight Route To on the information page, and press OK. Your Quest
calculates the route. Follow the calculated route to the destination.
To find an address and route to it:
1. Press the FIND key, highlight Addresses, and press OK.
2. A Wizard opens. Highlight the state if it appears on a button, or choose
Select State and find the correct name. Press OK.
3. Highlight Search All Cities, and press OK. You can also highlight
Spell City, and press OK. Enter the city using the on-screen keyboard.
4. Enter the address number and street using the on-screen keyboard.
For intersections, you only need to enter street names.
5. A list of addresses appears. Highlight the desired address, and press
OK. An Address page appears.
6. To create a route to this address, highlight Route To, and press OK.
Quest
™
2 Quick Reference Guide
Use this Quick Reference Guide to learn how to perform common
operations with your Quest 2. For a more thorough and detailed
explanation of operations and features, consult the Owner’s Manual.
Keep this guide in a handy place for future reference.
Turning the Quest On
Press and hold the Power
key on the front of the unit to turn it on.
Vehicle Installation
Select a suitable location for installing the unit that allows routing of
the power cord and does not interfere with vehicle operation. Refer to
the safety warnings in the Owner’s Manual. Select a location where the
Quest’s flip-up antenna has an unobstructed view of the sky. For optimal
use, position the antenna parallel to the surface of the road.
Stopping & Starting Routes and Adding Via PointsInstalling the Suction Cup Mount
Suction
cup
Lever
Release
tab
Cradle
Suction
cup tab


