


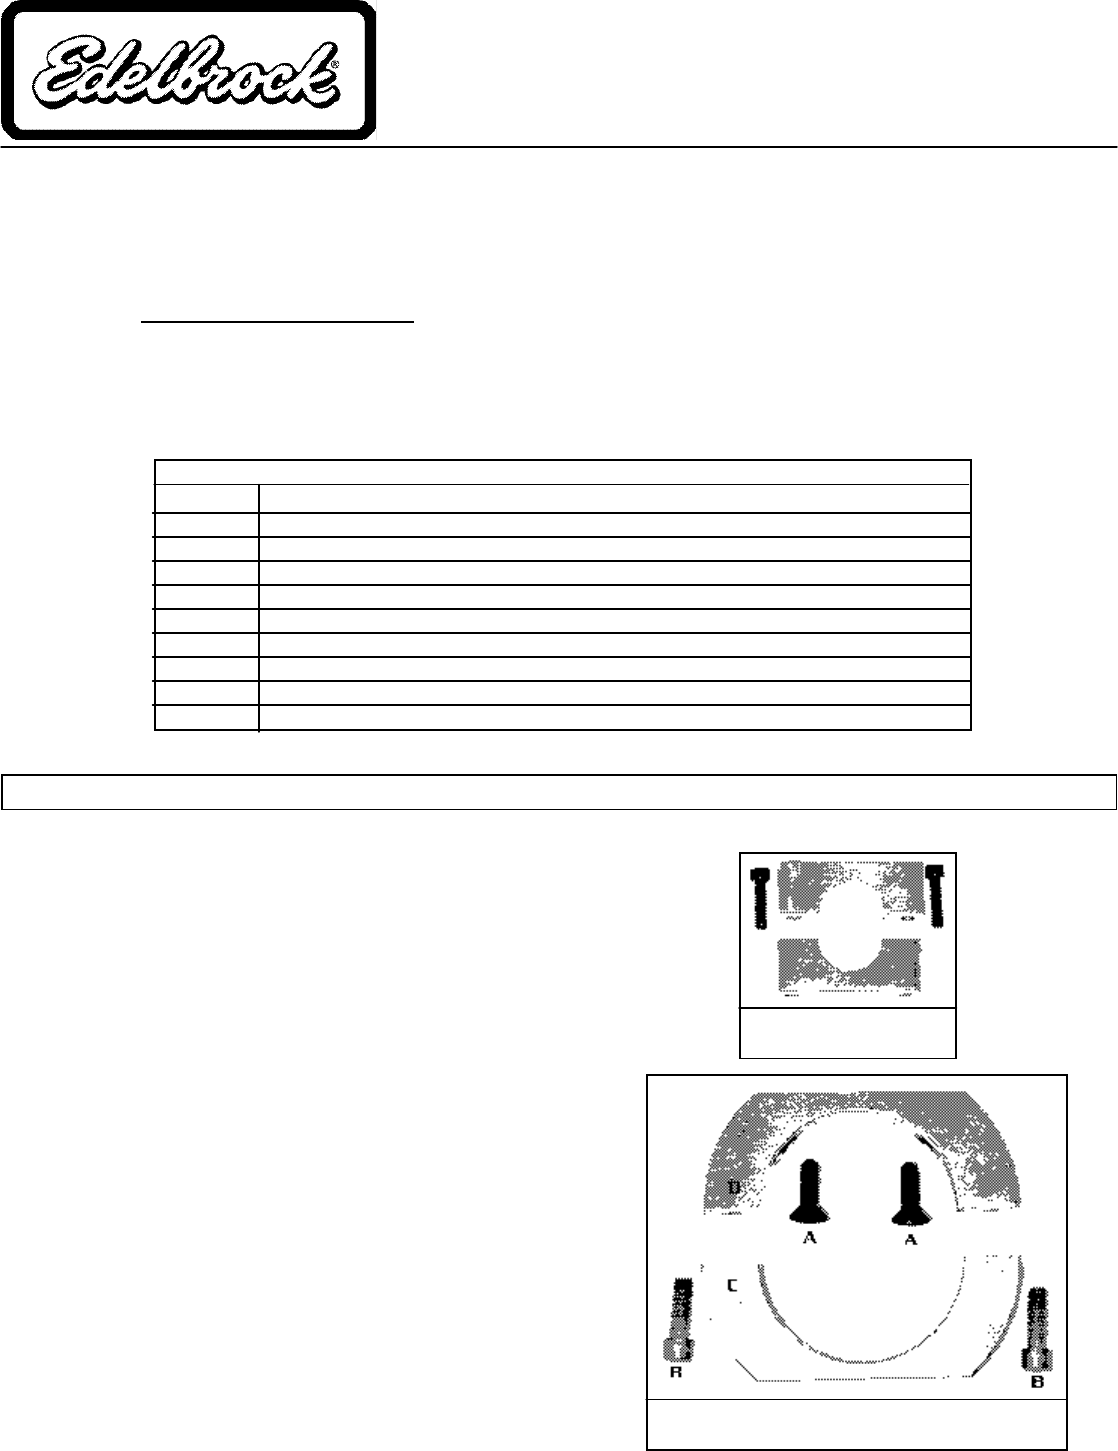
Quantity Description
2 12 oz. BOTTLE CLAMP W/O FRAME ADAPTER (C&D)
4 ¼"-20 X .750" 82 DEG. COUNTERSINK SCREW FOR BOTTLE CLAMP (A)
4 ¼"-20 X .750" SOCKET HEAD CAP SCREW FOR BOTTLE CLAMP (B)
1 #4 AN X 12" CLEAR COATED BRAIDED STAINLESS STEEL CROSS-OVER LINE STRAIGHT
1 12 oz. NITROUS BOTTLE POLISHED WITH VALVE
1 #4 AN X 1/8" NPT MALE X 90 DEG. FITTING BLUE
1 TEE # 4 FLARE X 1/8" NPT ON RUN BLUE
2 12 OZ. BOTTLE LABELS
1 INSTRUCTION SHEET
ASSEMBLY
Brochure #63-0077
© 2002 Edelbrock Corporation
Rev. 03/02
Page
1
of 2
Please study these instructions carefully before installing your new Edelbrock Nitrous System. Failure to follow
instruction will void warranty and may cause damage to parts and/or personal injury. If you have any questions or problems,
please call our Technical Hotline at: 1-800-416-8628 , 7:00 am – 5:00 pm, Pacific Standard Time, Monday through Friday
or e-mail us at edelbrock@edelbrock.com.
ACCESSORIES & INSTALLATION ITEMS: Recommendations are listed below. However, due to the variety of years, makes
and models to be covered, please review each part listed in the Installation Items section of the Edelbrock catalog to decide
whether more items are required for your specific application than are mentioned in these instructions. See our catalog for
details. To order a catalog, call (800) FUN-TEAM.
DOUBLE TROUBLE HARLEY-DAVIDSON
12-oz. BOTTLE CONVERSION KIT
Kit #71920
INSTALLATION INSTRUCTIONS
NOTE: This instruction sheet is a supplement to the #71910-#71919 Performer RPM Harley-Davidson Nitrous
System Instructions.
KIT CONTENTS
WARNING:The frame brackets are NOT included in this kit. The frame brackets must be purchased separately according
to frame size, refer to the catalog for part numbers.
Frame bracket
not included
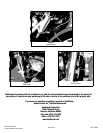
1. Follow in the steps described in the #71910- #71919 instructions.
2. Install frame bracket to forward frame as seen in figure 2.
3. Attach bottle bracket (D) to frame brackets using screws (A). See
figures1 & 2.
4. Connect Nitrous hose to solenoid and main bottle using tee fitting
supplied as seen in figure 3.
Figure 1
Bottle Bracket
5. Connect Nitrous crossover hose to secondary bottle as seen in
figure 4 using 90º fitting.
6. Attach bottle bracket (C) to bottle bracket (D) using socket head
screws (B) see figures 1&2.
7. For proper label alignment, additional bottle labels are provided.