


!
Safety Precautions
Follow all manufacturer safety guidelines for operating your device.
Failure to practice safe usage of GPS device while driving may result
in damage, injury, or death.
Arkon is not responsible for any damages caused to your car, your
device, or yourself due to the installation or use of this pedestal mount.
www.arkon.com
Arcadia, CA 91006 USA
Designed in USA | Made in China
© Copyright 2010 Arkon Resources, Inc.
Consumer Hotline:
USA (800) 841-0884
INT’L (626) 254-9005
Monday - Friday 9 am - 5 pm, PST
The Mobile Mounting Specialists™
®
TTSE110
|
Windshield, Dashboard, & Vent Mount for TomTom Start™ & Ease™
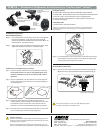
Package Contents:
(1) GN014-SBH Travelmount® Mini windshield suction pedestal
(1) GN047-SBH - Removable air vent mount with dual-T swivel ball head
(1) APTTSE - Dual-T to TomTom Start™ & Ease™ Adapter plate
(1) AP013 Self-Adhesive dashboard or console pedestal mounting disc
(1) Alcohol cleaning pad
GN047-SBH
Air Vent Mounting with
pedestal
APTTSE
Adapter for
TomTom
Start™ & Ease™
Do not place mount in or near an air bag deployment zone
or where it will obstruct view of the road.
!
Compatible with:
• TomTom Start™ and TomTom Ease™
Installation Instructions
Continued on next page...
AP013 Disc
( 80 mm)
GN014-SBH
Windshield Or Dashboard
Mounting with Swivel Ball
Head Assembly
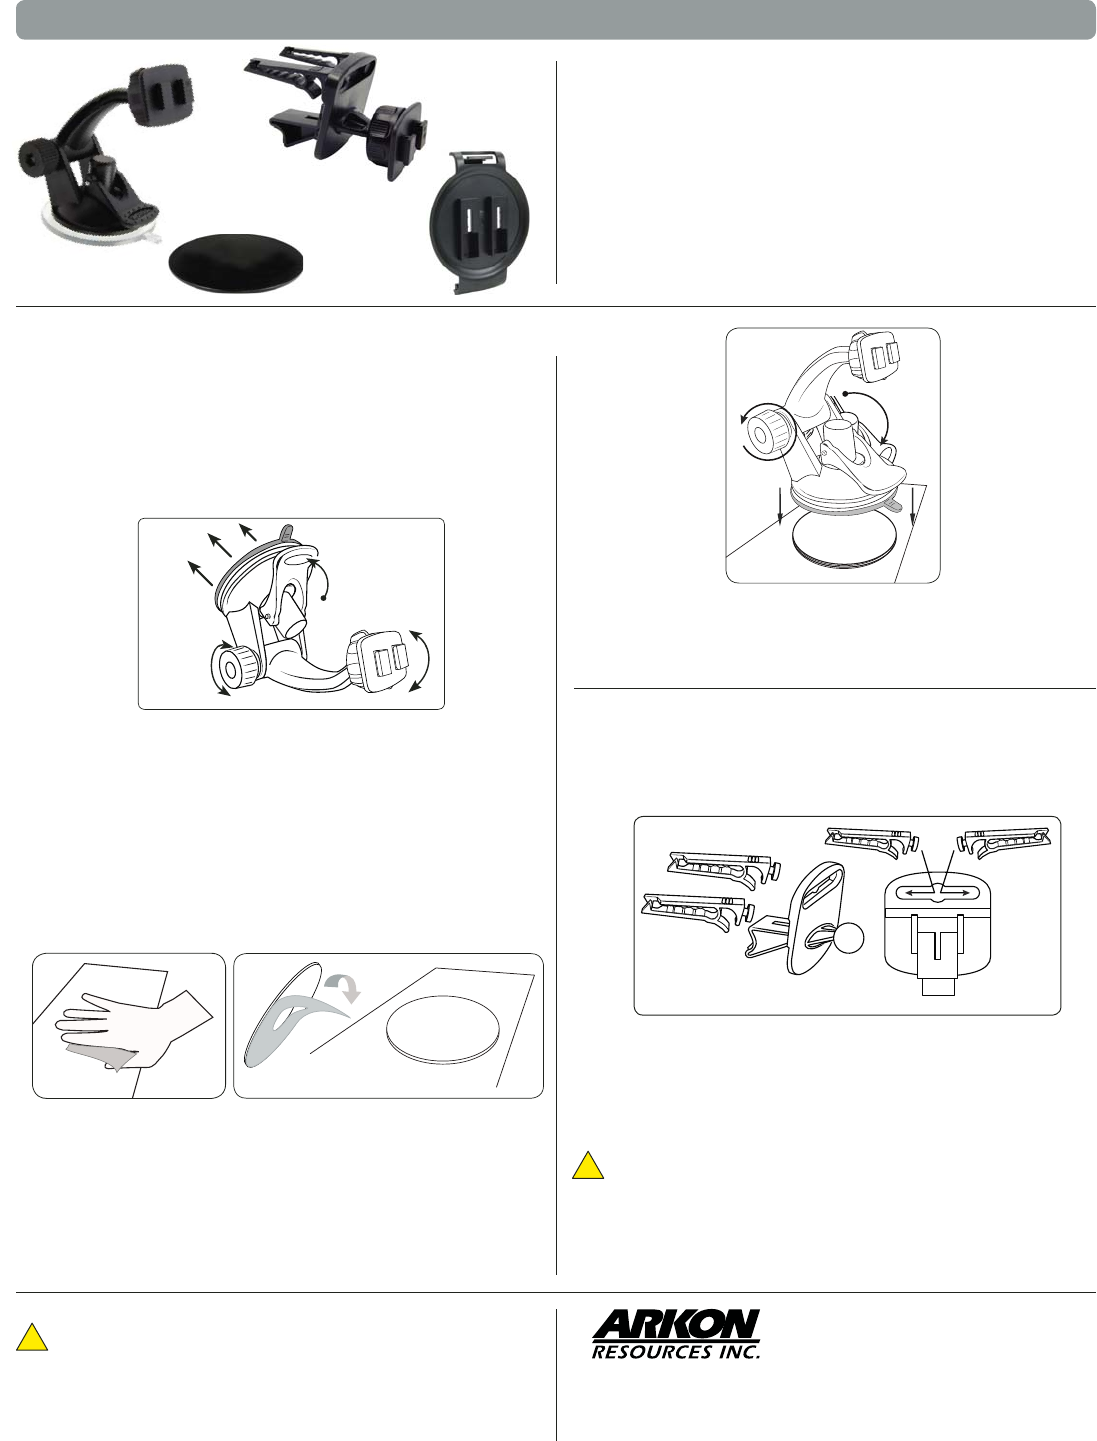
Windshield Mounting
Step 1.
Step 2.
Find a safe location on the interior of the vehicle’s windshield
to mount the pedestal. Firmly push the suction base (A)
against the windshield and fl ip the base lever down (B) to the
locked position. See diagram below.
Adjust the angle of the pedestal arm by tightening the angle
adjustment knob (C) at the base to the desired angle.
A
B
C
Choose a suitable location for disc (and pedestal) installation.
Do not place mount in or near an air bag deployment zone
or where it will obstruct view of the road or hinder vehicle
operation.
Clean the dashboard or console surface area thoroughly with
the included alcohol pad. Allow the area dry before applying
the mounting disc.
Remove the paper backing of the disc and place on the
cleaned surface. Press the top of the disc down fi rmly to allow
the adhesive to stick to the surface. Allow 24 hours for the
adhesive to cure to the surface before applying any pressure.
Step 1.
Step 2.
Step 3.
Dashboard or Console Mounting Instructions
Place the suction cup of the pedestal fi rmly down on the center
of the mounting disc and lower the securing lever.
Step 4.
Push the pedestal suction cup (A) down onto the disk (D). Flip the
lever (B) down to secure the suction cup. Adjust the angle of the
arm by loosening the adjustment knob (C).
Step 6.
c
A
B
D
TomTom, Start and Ease are product names, trademarks, or registered trademarks
of TomTom International b.v. Arkon Resources, Inc. is not affi liated with TomTom
International b.v.
Attach the vent mounting clips (A) to the back of the pedestal
(B) with the vent clips positioned with the fl at sides facing up.
Step 1.
Air Vent Mount Assembly
A
A
B
B