


128-8614
6 of 8
Page 6
On-Board Shock Sensor Setting:
1. Enter the vehicle, and turn the ignition key to the “on” position.
2. Press and release the valet/override/program push button switch 3 times. Siren
Chirps Once & Led Flash Once
3. Turn the ignition off than on, you will hear short chirp followed by long chirp.
4. Turn the ignition off then on, you will hear two long chirps indicating that you are in
the shock adjust mode.
5. Press the lock button to increase, and the Unlock button to decrease. The siren
will chirp 1-14 times 1 being lowest and 14 being highest. Firmly strike the bumper of
the vehicle during the setting until you find the desired setting for the Full Trigger Stage.
6. Press both the Lock & Unlock buttons of the transmitter simultaneously until the
siren emits two long siren chirps indicating that you are in the Pre-Detect stage.
7. Press the Lock button to increase, and the Unlock button to decrease. The siren will
chirp 1-14 times 1 being lowest and 14 being highest. Firmly strike the bumper of the
vehicle during the setting until you find the desired setting for the Pre-Detect Stage.
Once you have achieved the desired setting, either turn the ignition off or allow 60 sec-
onds of inactivity to expire to exit the Shock Adjust Mode. Exit of the shock adjust mode is
indicated by the siren emitting 3 long chirps.
CAUTION: Never perform this test on the vehicle’s glass, as you may break the
window.
WARNING ! Setting the sensitivity too high can cause false alarms due to noise vibrations
from passing trucks and heavy equipment. To decrease sensitivity, follow steps 1-5 above
and use the trunk button to decrease.
BATTERY REPLACEMENT
The transmitter incorporates a small LED visible through the case which is used to indicate
battery condition. You will notice a decrease in transmitter range as the
battery condition deteriorates. Transmitter battery replace-
ment is recommended at least every 10 to 12 months, de-
pending upon how frequently the transmitter is used.
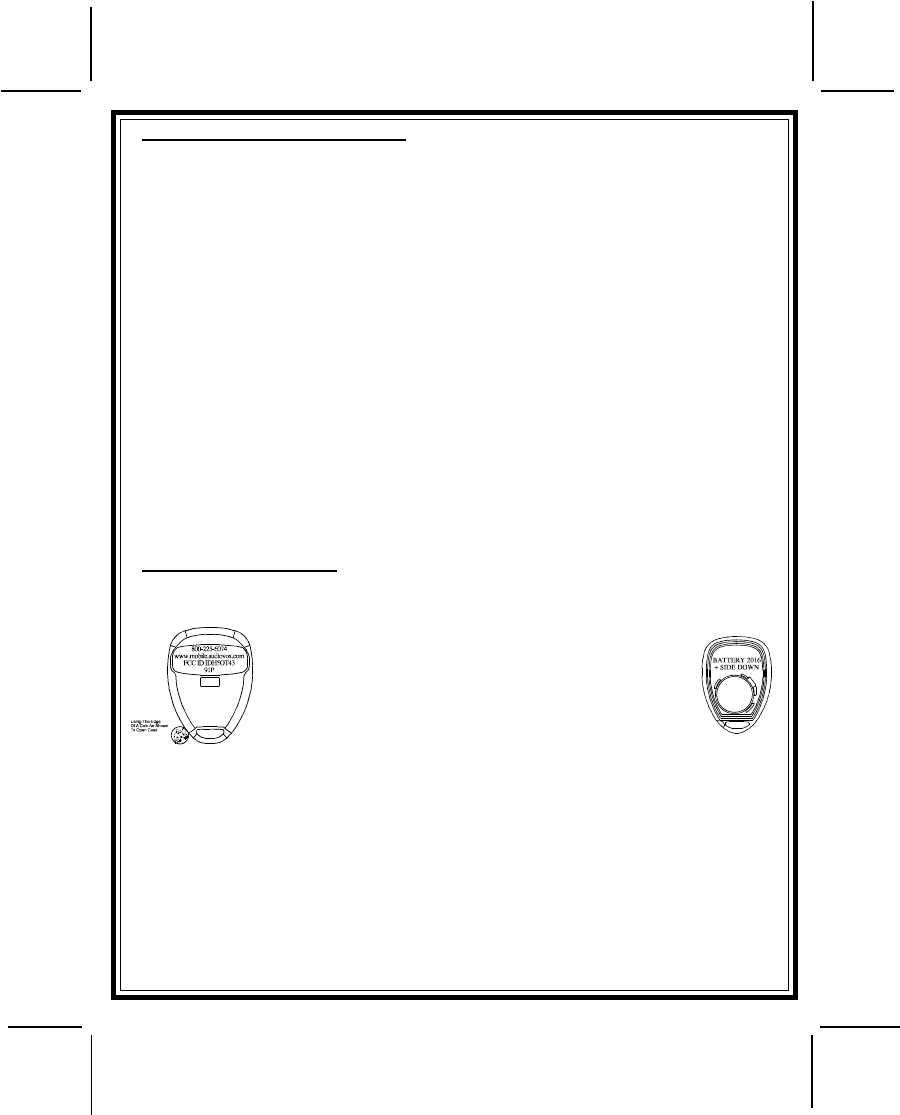
To replace the battery in the 91P Transmitter
1) Carefully pry apart the case using the edge of a coin
as shown.
2) Remove the rear cover to access the discharged
battery paying attention to the proper polarity
orientation.
3) Carefully remove and properly dispose of the discharged battery.
4) Insert the new battery, than carefully snap closed the transmitter case.
5) If you accidently dislodge the circuit board from the transmitter housing, be certain that
the rubber membrane is seated properly, and the buttons are properly exposed from
the front view of the case, then insert the circuit board, and return to step #4.
91P Uses 2 x CR2016 Lithium Battery